
Clamps and sidearms in Vectorworks Spotlight 2026 give you precise control over how your lights and rigging hardware connect, so you can draw faster and build a more accurate model of the rig you plan to install.
With dedicated tools, smart hanging hardware, and support for Braceworks calculations, you can focus on design decisions instead of wrestling with workarounds or manual edits.
Smarter Hanging Hardware from the Start
Vectorworks Spotlight 2026 introduced a focused workflow for rigging clamps and hanging hardware that fits the way you already place lighting devices. With the new clamp feature, you can assign clamps as you draw, swap configurations as needs change, and trust that your fixtures will sit correctly on truss cords and pipes in both 2D and 3D views.

Using the Hanging Hardware Resource Selector in the Lighting Device tool, you pick clamp symbols before you place lights, so each fixture drops in with the correct hardware already applied. You can also browse a dedicated Spotlight library of single and double clamp combinations, with and without omega brackets.
From there, clamp definitions drive correct alignment to pipes and truss elements, so you get realistic hanging behavior without extra editing after placement.
Custom Clamp Symbols That Match Your Rig
If your company, rental house, or venue doesn’t use clamps in the Spotlight library, don’t fret. Vectorworks Spotlight treats clamp symbols as fully editable resources that you can tune to your inventory and fixture lineup.
You can adjust stock content or build your own symbols so your drawings match what the crew hangs onsite. You might duplicate an existing clamp symbol from the library, then edit the 3D component to change spacing for double clamps, reposition omega brackets, or tweak geometry for a specific fixture, such as a multi‑cell bar.
As you edit, the 3D loci must stay intact, and you can move the clamp geometry relative to the symbol’s internal origin so snapping to truss chords and pipes stays accurate. When you need something entirely new, you can create a symbol from scratch that includes clamp geometry and 3D loci, then just align the geometry to the origin, and align the loci vertically to the origin and horizontally to the bottom of the clamp where it connects to the light.
You can classify the rigging clamp geometry into Lighting‑Clamp‑Clamp and the loci into Lighting‑Clamp‑NonPlot, so you can control visibility and keep non‑plot elements out of printed documentation. Then, attach the Light Info Record and Parts (Pass) Record, set the Pass record’s base option, and mark the Light Info device type as a clamp to integrate the symbol into Vectorworks Spotlight’s lighting and rigging capabilities.
Once the geometry is set and data is attached, Vectorworks Spotlight and Braceworks will treat the symbol like any real piece of hardware.
When you’re happy with the result, save finished clamp symbols into your User or Workgroup library folders so you can reuse them across shows without rebuilding content.
Default Clamps on Your Lighting Symbols
You can push this customization further by giving lighting symbols default clamps, so your go‑to fixtures always drop into your design with the hardware you want.
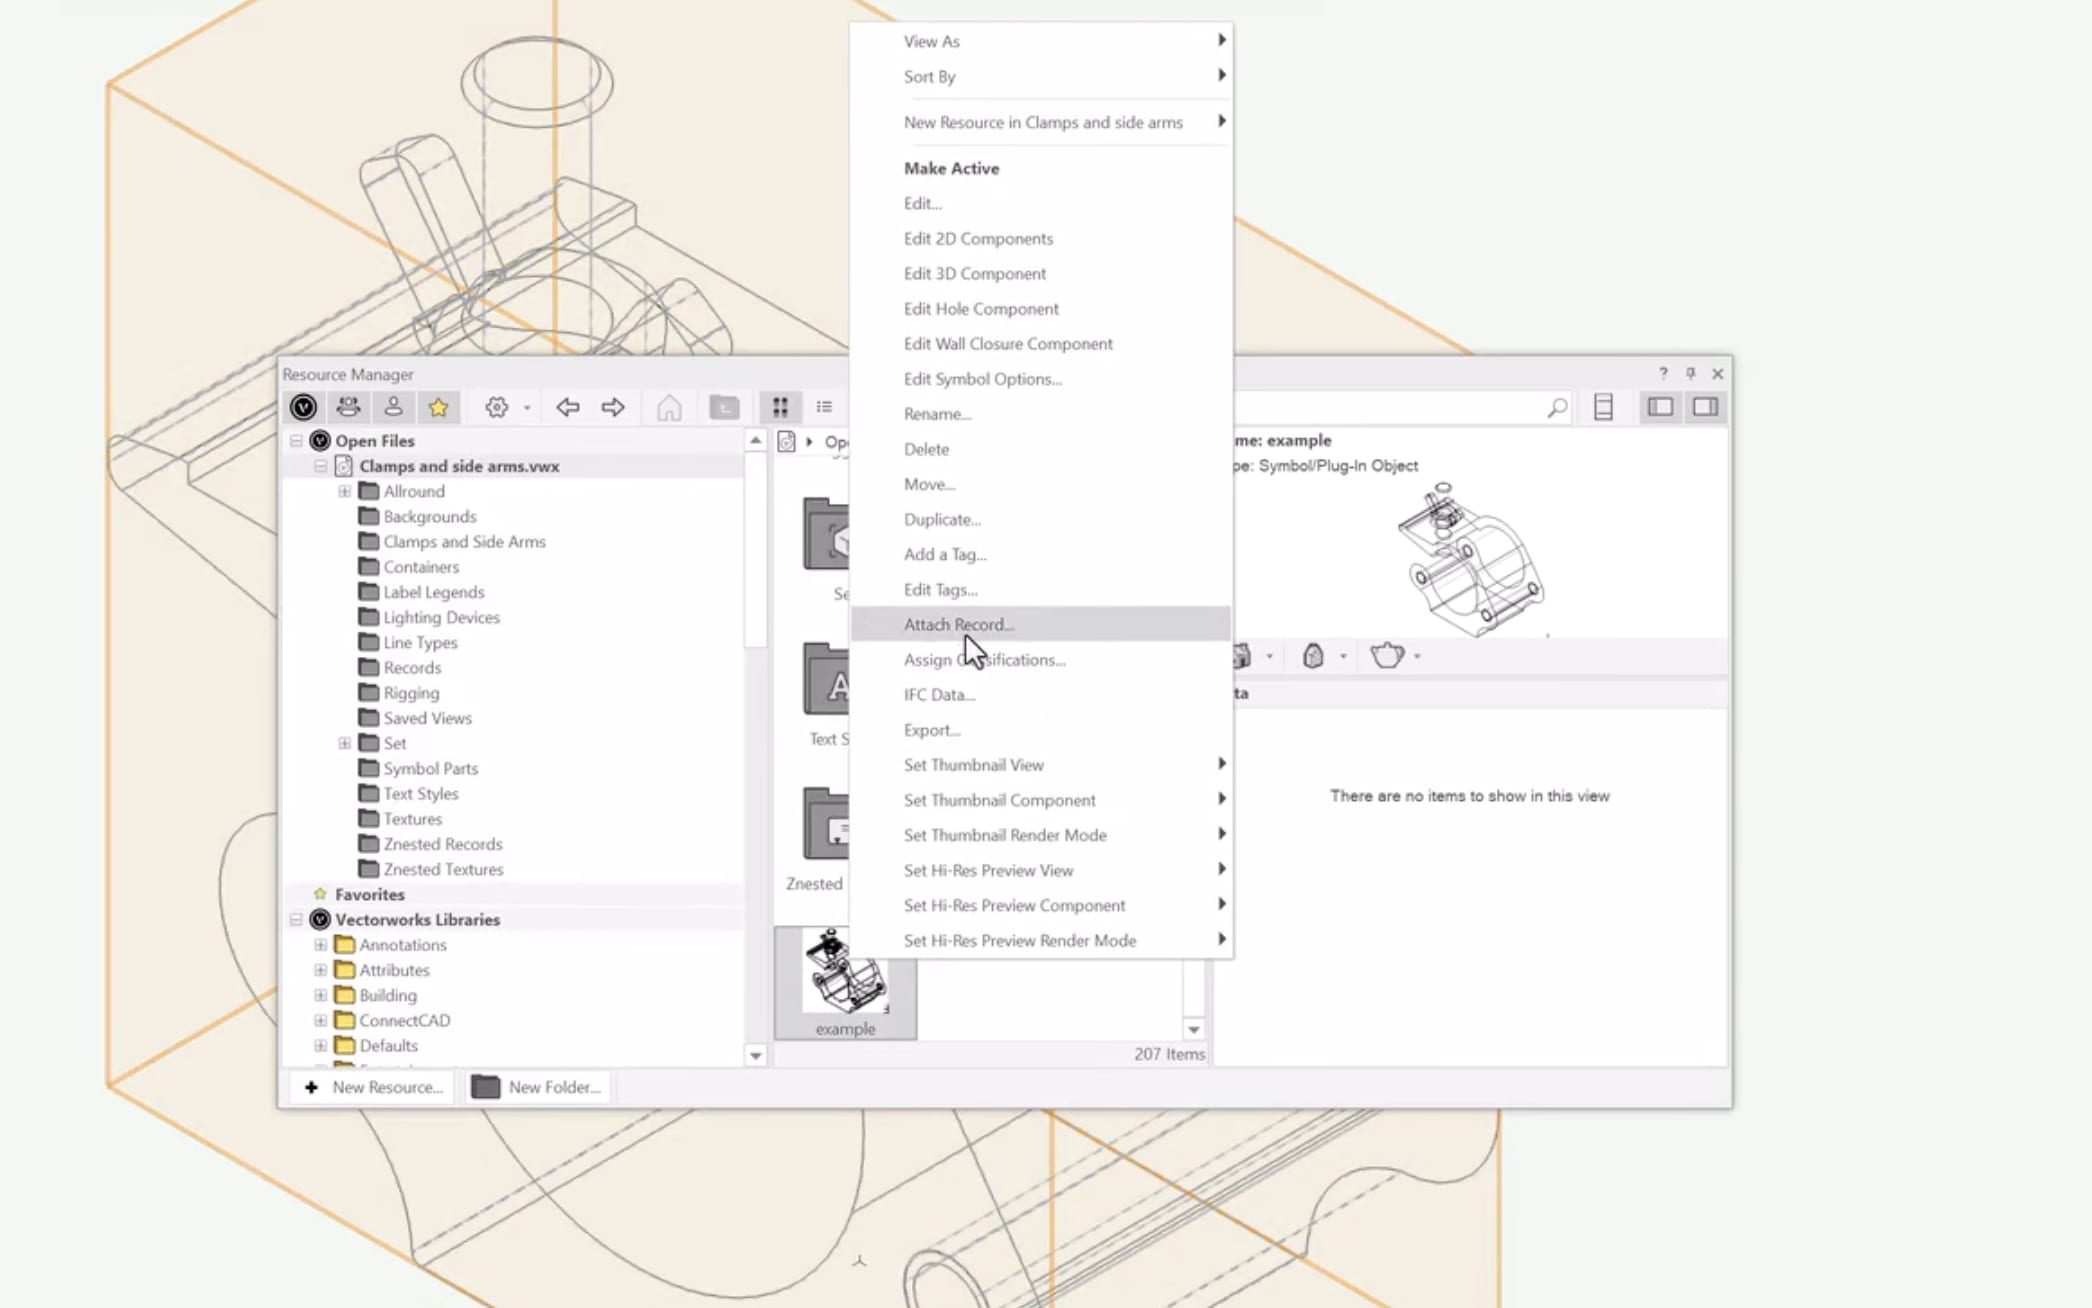
To assign default clamps to a light, open the Resource Manager, select the light in your active file, right-click, and use the Attach Record command to edit the light info record of the light. Look for the Clamps field and enter the name of the clamp symbol you want to be associated with the light.
Just like your clamp symbols, save your updated fixture into a User or Workgroup library folder so it’s ready whenever you build a new show file. As you place those fixtures in new drawings, they come in with the default clamp already assigned.
Sidearms as Rigging and Load Objects
The new Sidearm tool in Spotlight 2026 treats sidearms, out‑rig pipes, drop arms, and similar assemblies as dedicated rigging objects that also behave like loads.
You can represent specialized arms and pipes that ensure lights and other equipment are correctly positioned when a new pipe or truss isn’t available. Simply insert sidearms via the Sidearm tool in your Rigging toolset, choosing single- or double-attachment mode and selecting pipe and clamp symbols from dedicated folders, including 90‑degree and parallel clamp options.
You can also give sidearms IDs with auto-numbering, and fixtures hung from the sidearm display the position ID of the truss or pipe that supports the arm.
With Vectorworks Spotlight’s hybrid drawing environment, you can work in 2D or 3D views, and in both cases, the Data bar reports the sidearm’s rotation angle so you can tab in to type an exact value.
Single‑Attachment mode focuses on drops and classic sidearms with one connection point. In this mode, you can attach an arm to a truss or pipe, rotate it around the supporting element’s axis in both 2D and 3D views to set direction or hanging angle while still getting a 3D rotation behind the scenes.
On a vertical truss or pipe, sidearms snap to the top of the geometry when drawn in 2D, so you may need to tweak trim height, while a truss lying flat places arms on the bottom chords.
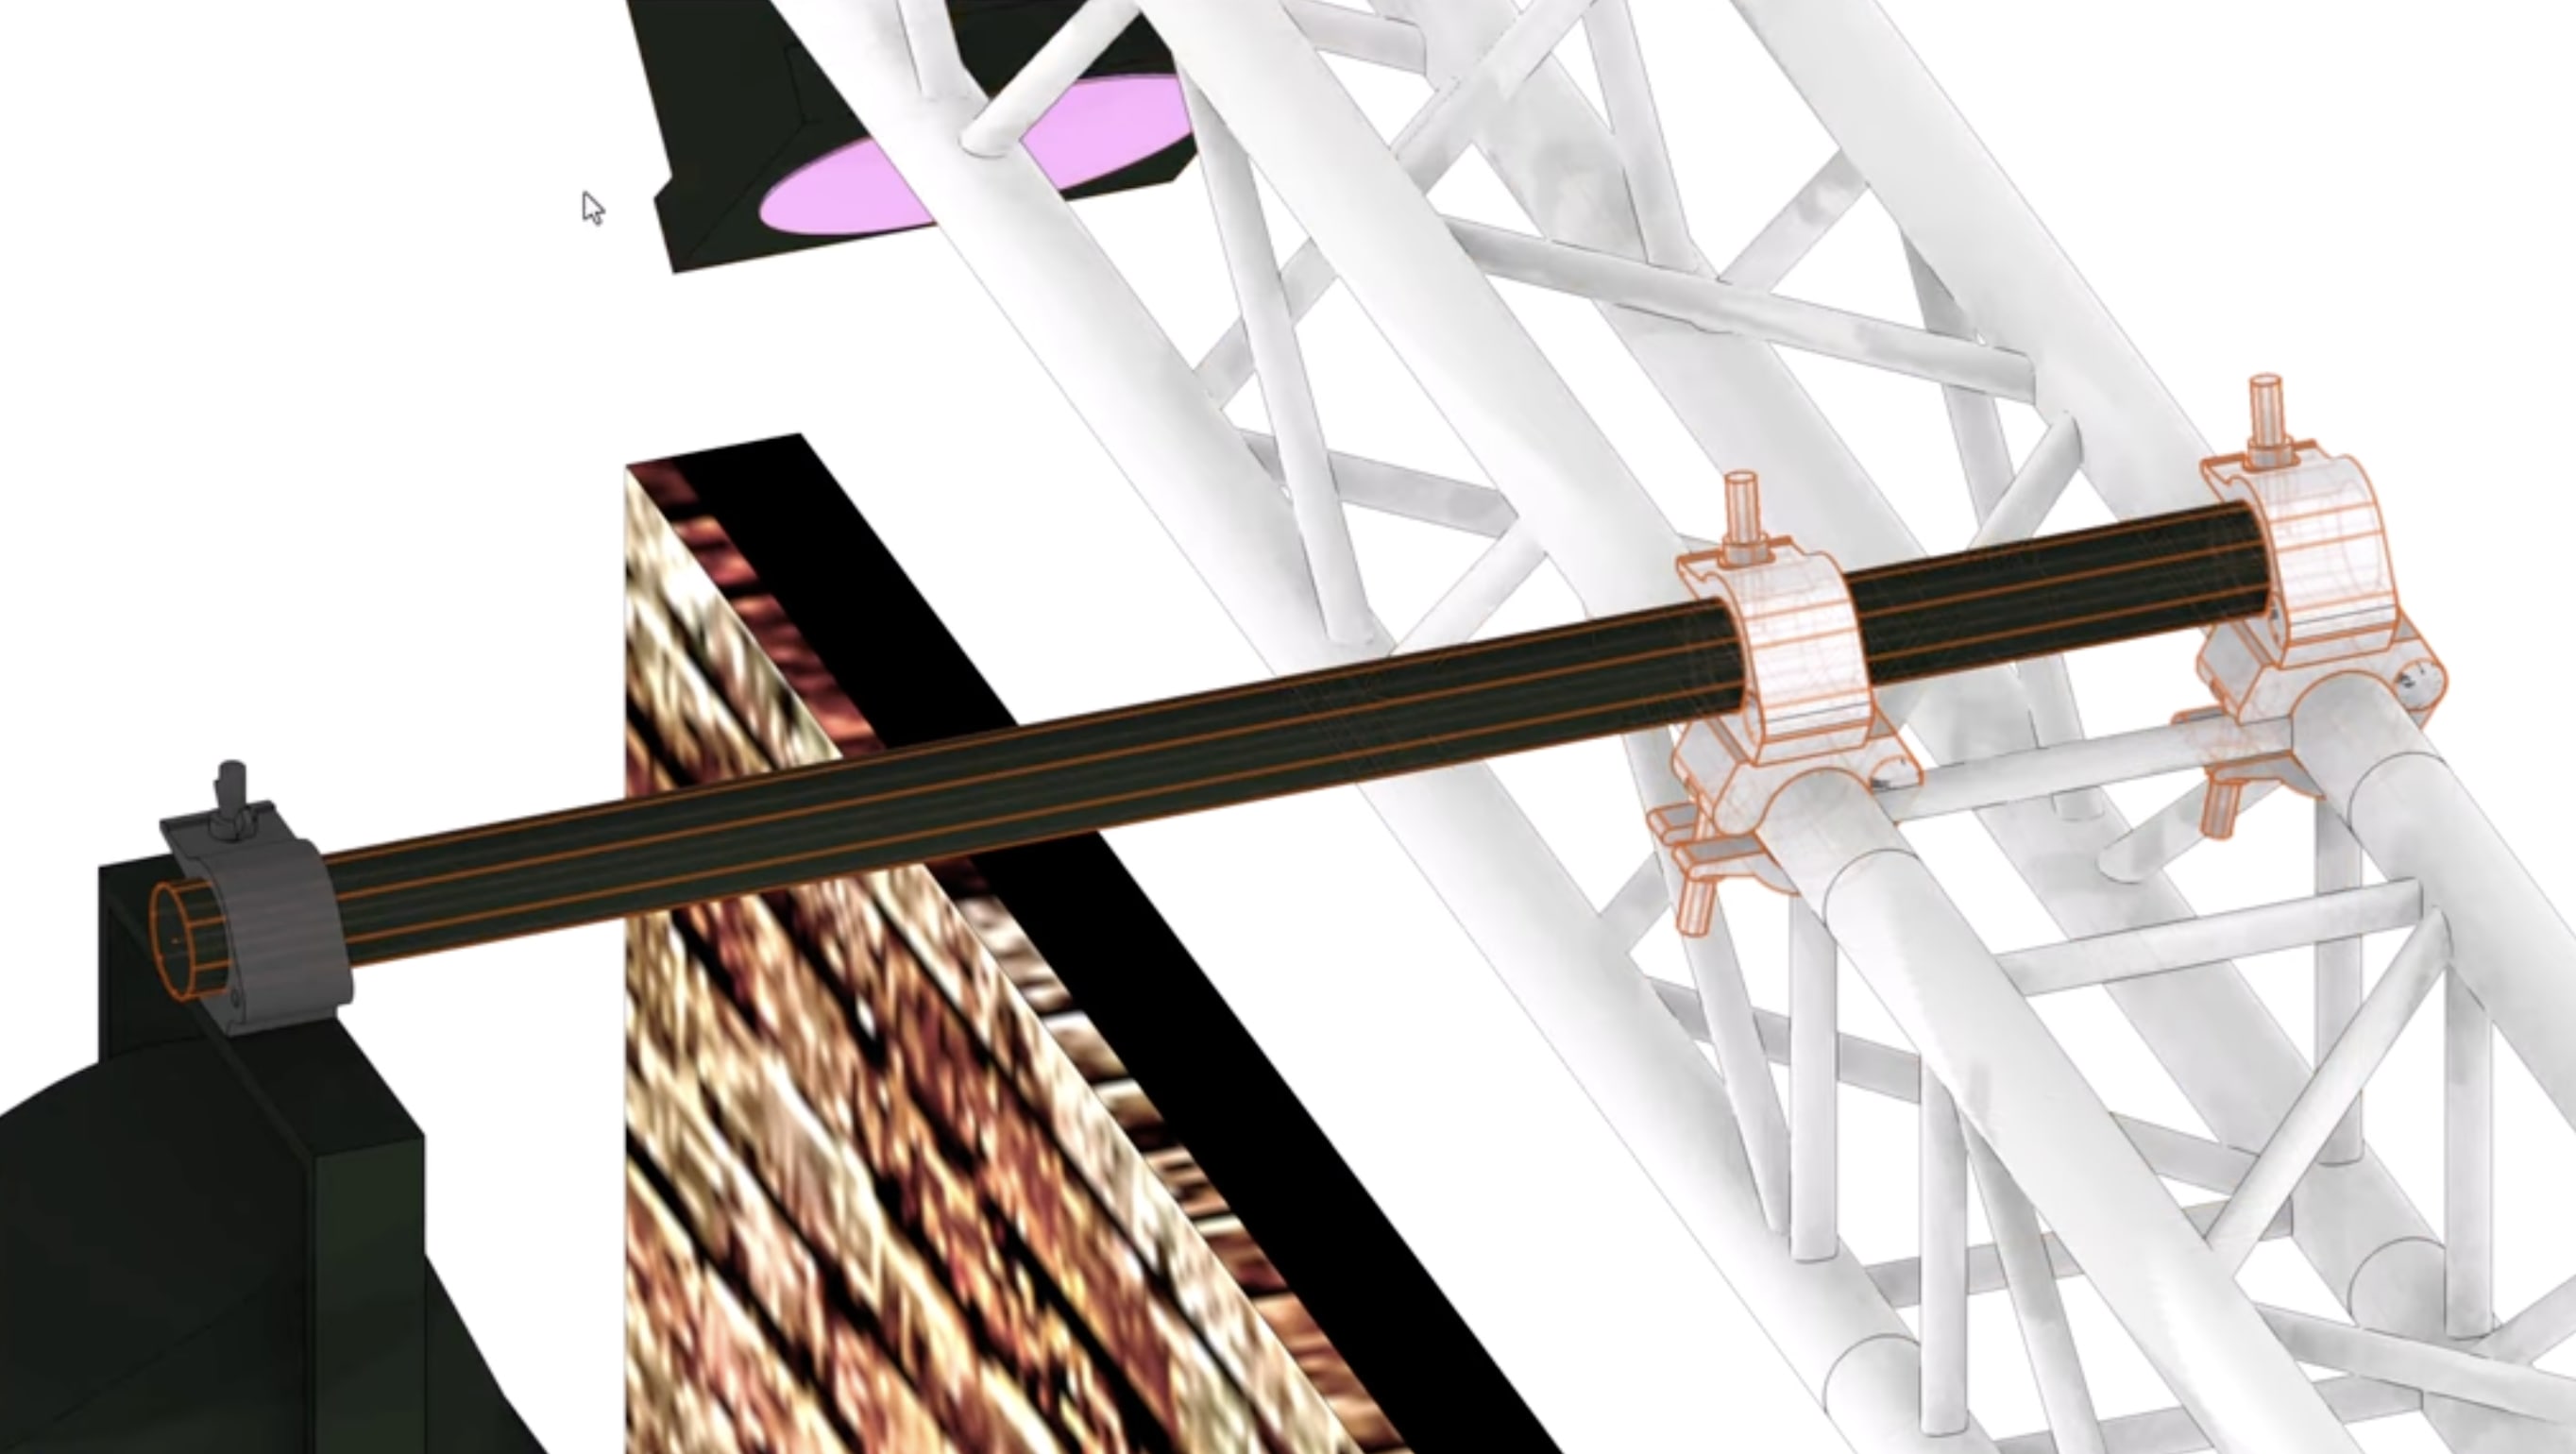
Double‑Attachment mode supports arms with two clamps. In this mode, you can attach a pipe with two clamps on trusses or towers, position the second clamp, and then slide the pipe into place while drawing in 3D for a more accurate layout. You can use 90‑degree clamps to run a pipe perpendicular to a truss or parallel clamps to run alongside, and for other angles, you duplicate and edit existing clamp symbols, so the geometry reflects your hardware.
Detailed Rigging Systems with Braceworks Integration
Once you’re comfortable with the clamp and sidearm workflow, you can start building more complex rigging systems that reflect what you’d build on site. These objects also carry Braceworks data, so they participate fully in structural calculations.
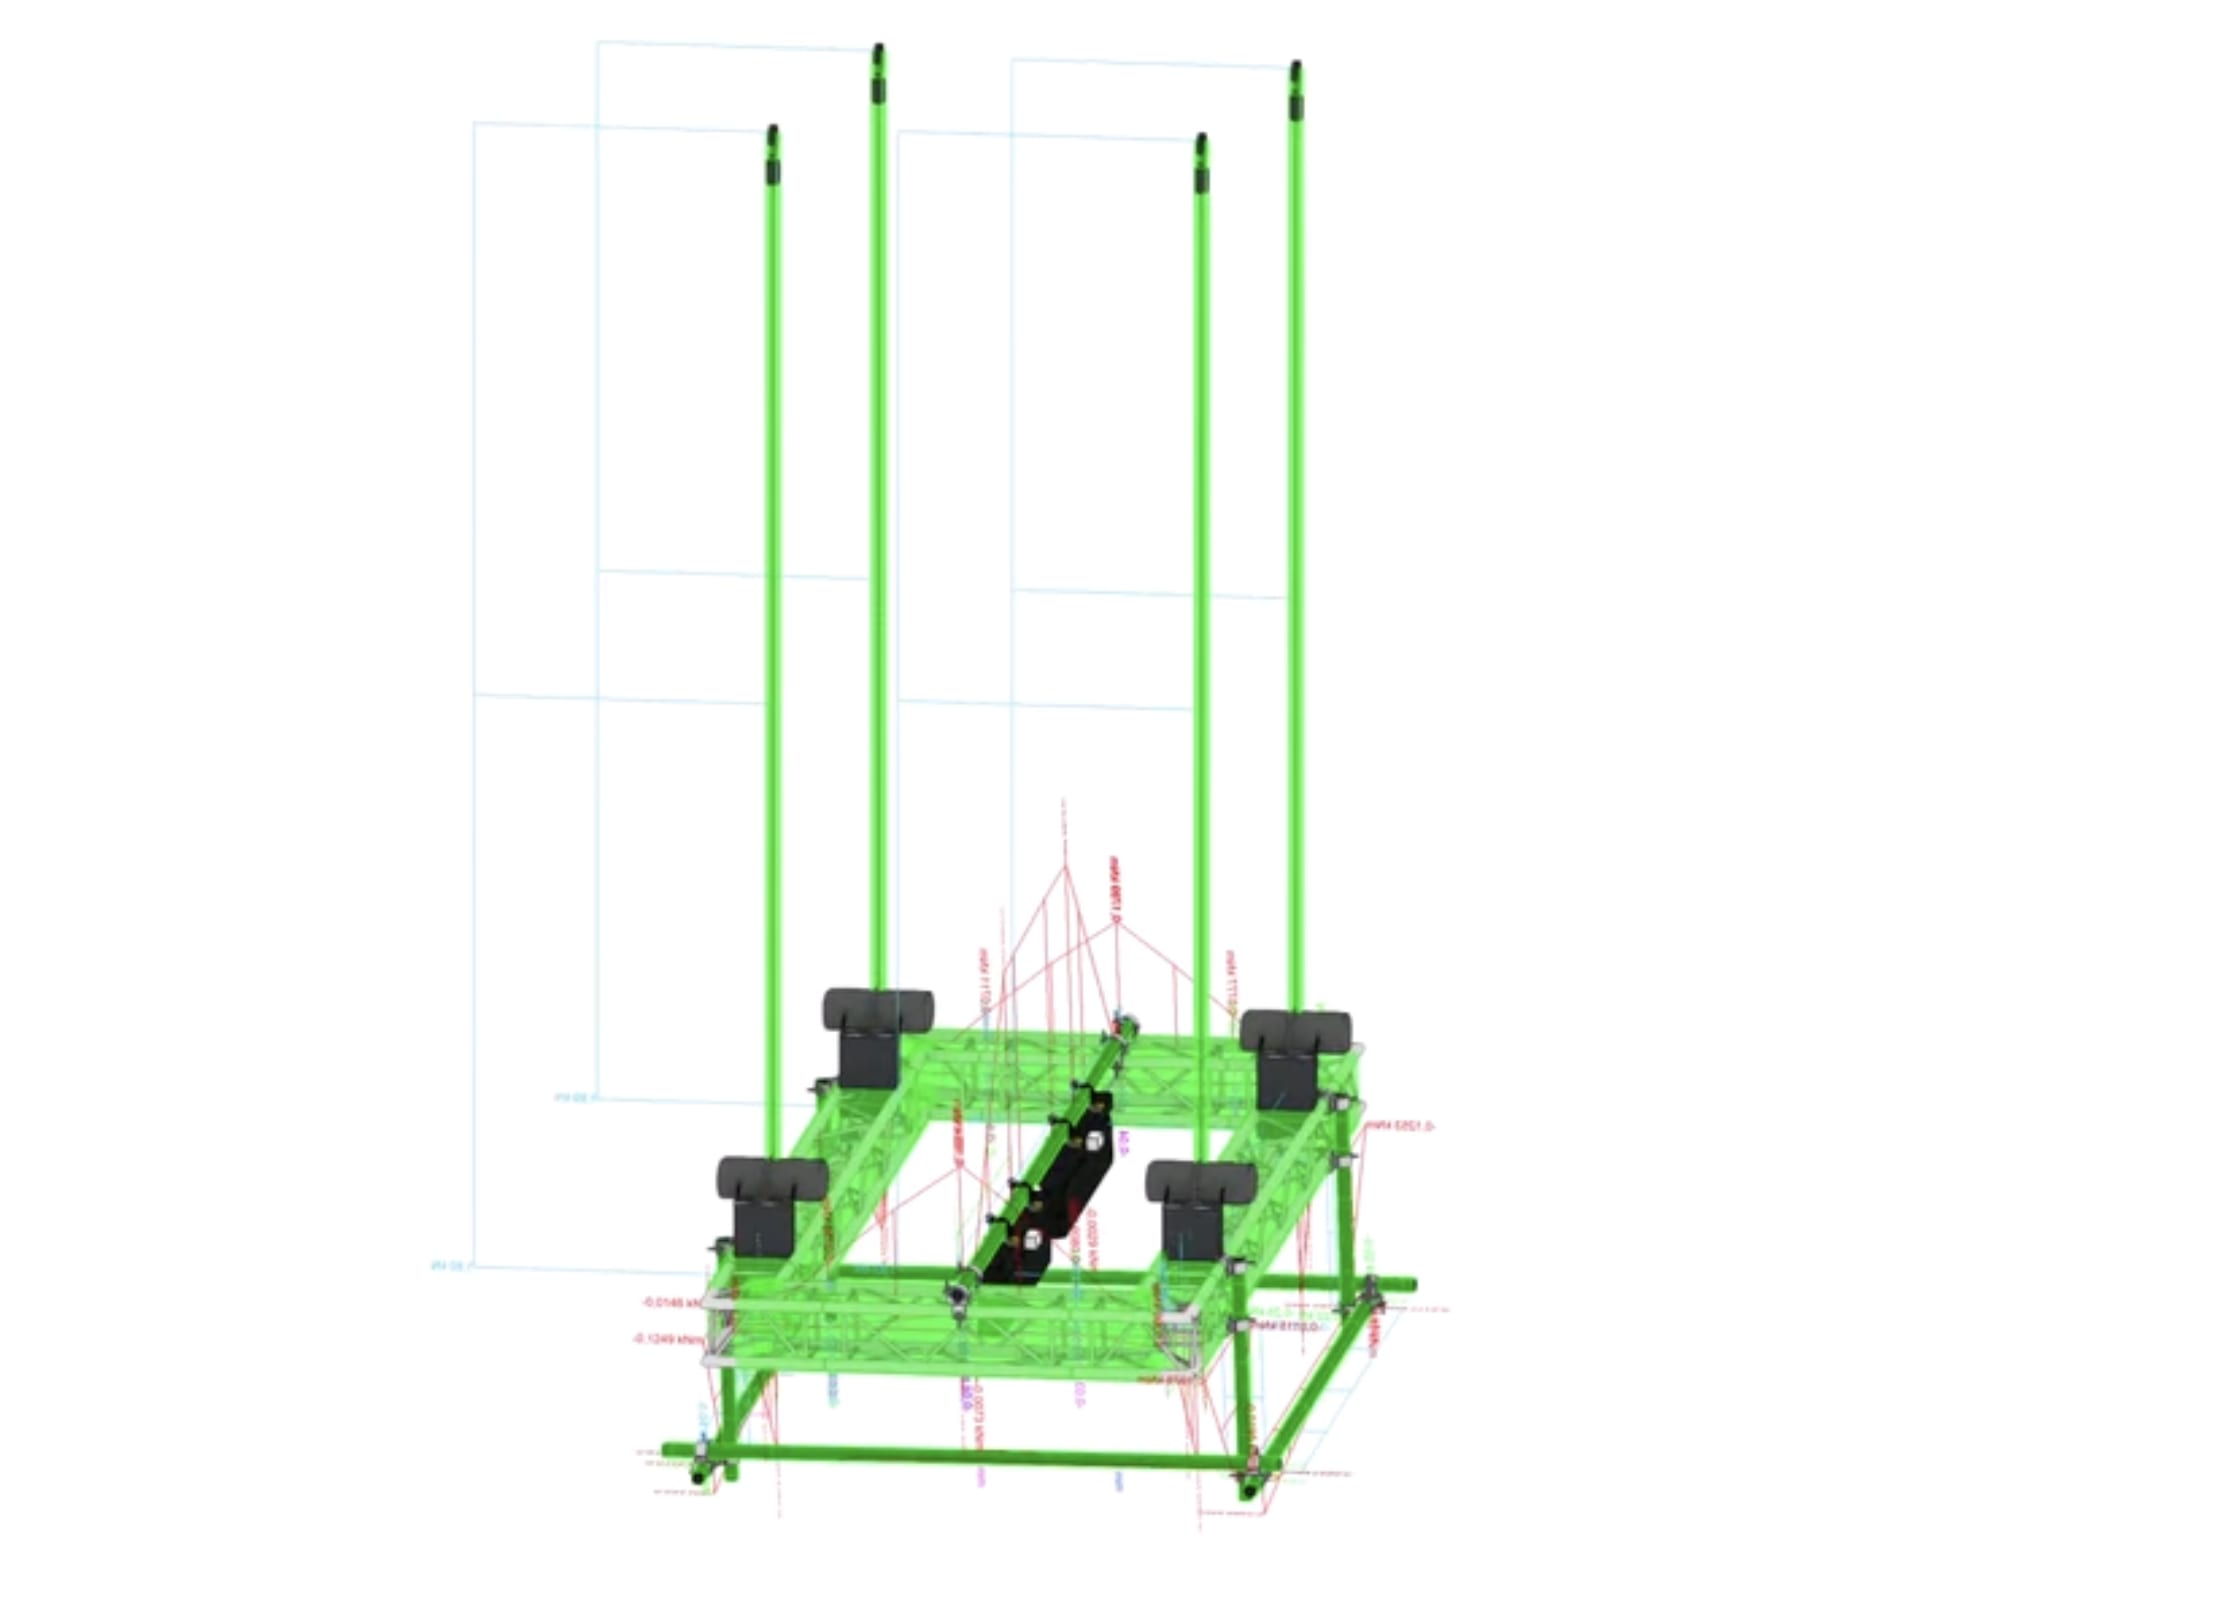
You can chain sidearms into frames, such as four drops with cross pipes, to represent softbox frames or similar assemblies that hang from truss but need precise geometry for coverage and weight distribution. You can also link trusses with sidearm‑placed pipes, giving trusses a hanging angle, and use double‑attachment mode and 90‑degree xclamps to connect them with spanning pipes that you can space visually. To build pipe ladders, insert two vertical drops in Single‑Attachment mode, then add horizontal rungs in Double‑Attachment mode before loading the ladder with fixtures.
Vectorworks Spotlight treats sidearms as both rigging and load objects with structural properties for Braceworks, which means they appear correctly in calculations and influence how the rest of the rig behaves under load. You can run Braceworks analyses to see how sidearms and attached equipment contribute to forces across your system, which helps you catch problems early and align your designs with real‑world constraints.
The clamp and sidearm workflows in Vectorworks Spotlight 2026 fit into a broader push toward smarter, more accurate entertainment design tools, so you can keep up with an industry that expects immersive, tightly engineered experiences on every show.
If you want to explore these tools further, you can dive into the “Clamps & Side Arms course” on Vectorworks University, reference the online help, or ask the Vectorworks AI Assistant (Preview) for intuitive guidance as you refine your rigging workflow.
YOUR AI GUIDE TO VECTORWORKS
Work Smarter with instant, reliable answers to your Vectorworks questions.
Stay in the know with the latest insights
Subscribers receive news, customer stories, success and learning tips, event information, and other important announcements from Vectorworks.
By submitting this form, you agree that Vectorworks, Inc. and its authorized partners may contact you in regards to news, offers, and the use of our software, services, and platforms. Learn more about our privacy practices and your data on our privacy page.*