Some of the most powerful features in Vectorworks design software are the ones that quietly transform how you see your work every day. The Clip Cube command is one of those features: a fast way to cut into your 3D model, understand complex spaces, and create more focused drawings and presentations.
You can even use it to isolate problem areas, capture focused 3D views, and create section and detail viewports directly from your model, whether you need to see inside a building core, understand how a rigging system threads through a venue, or quickly compare structural and MEP layouts.
What Is Clip Cube?
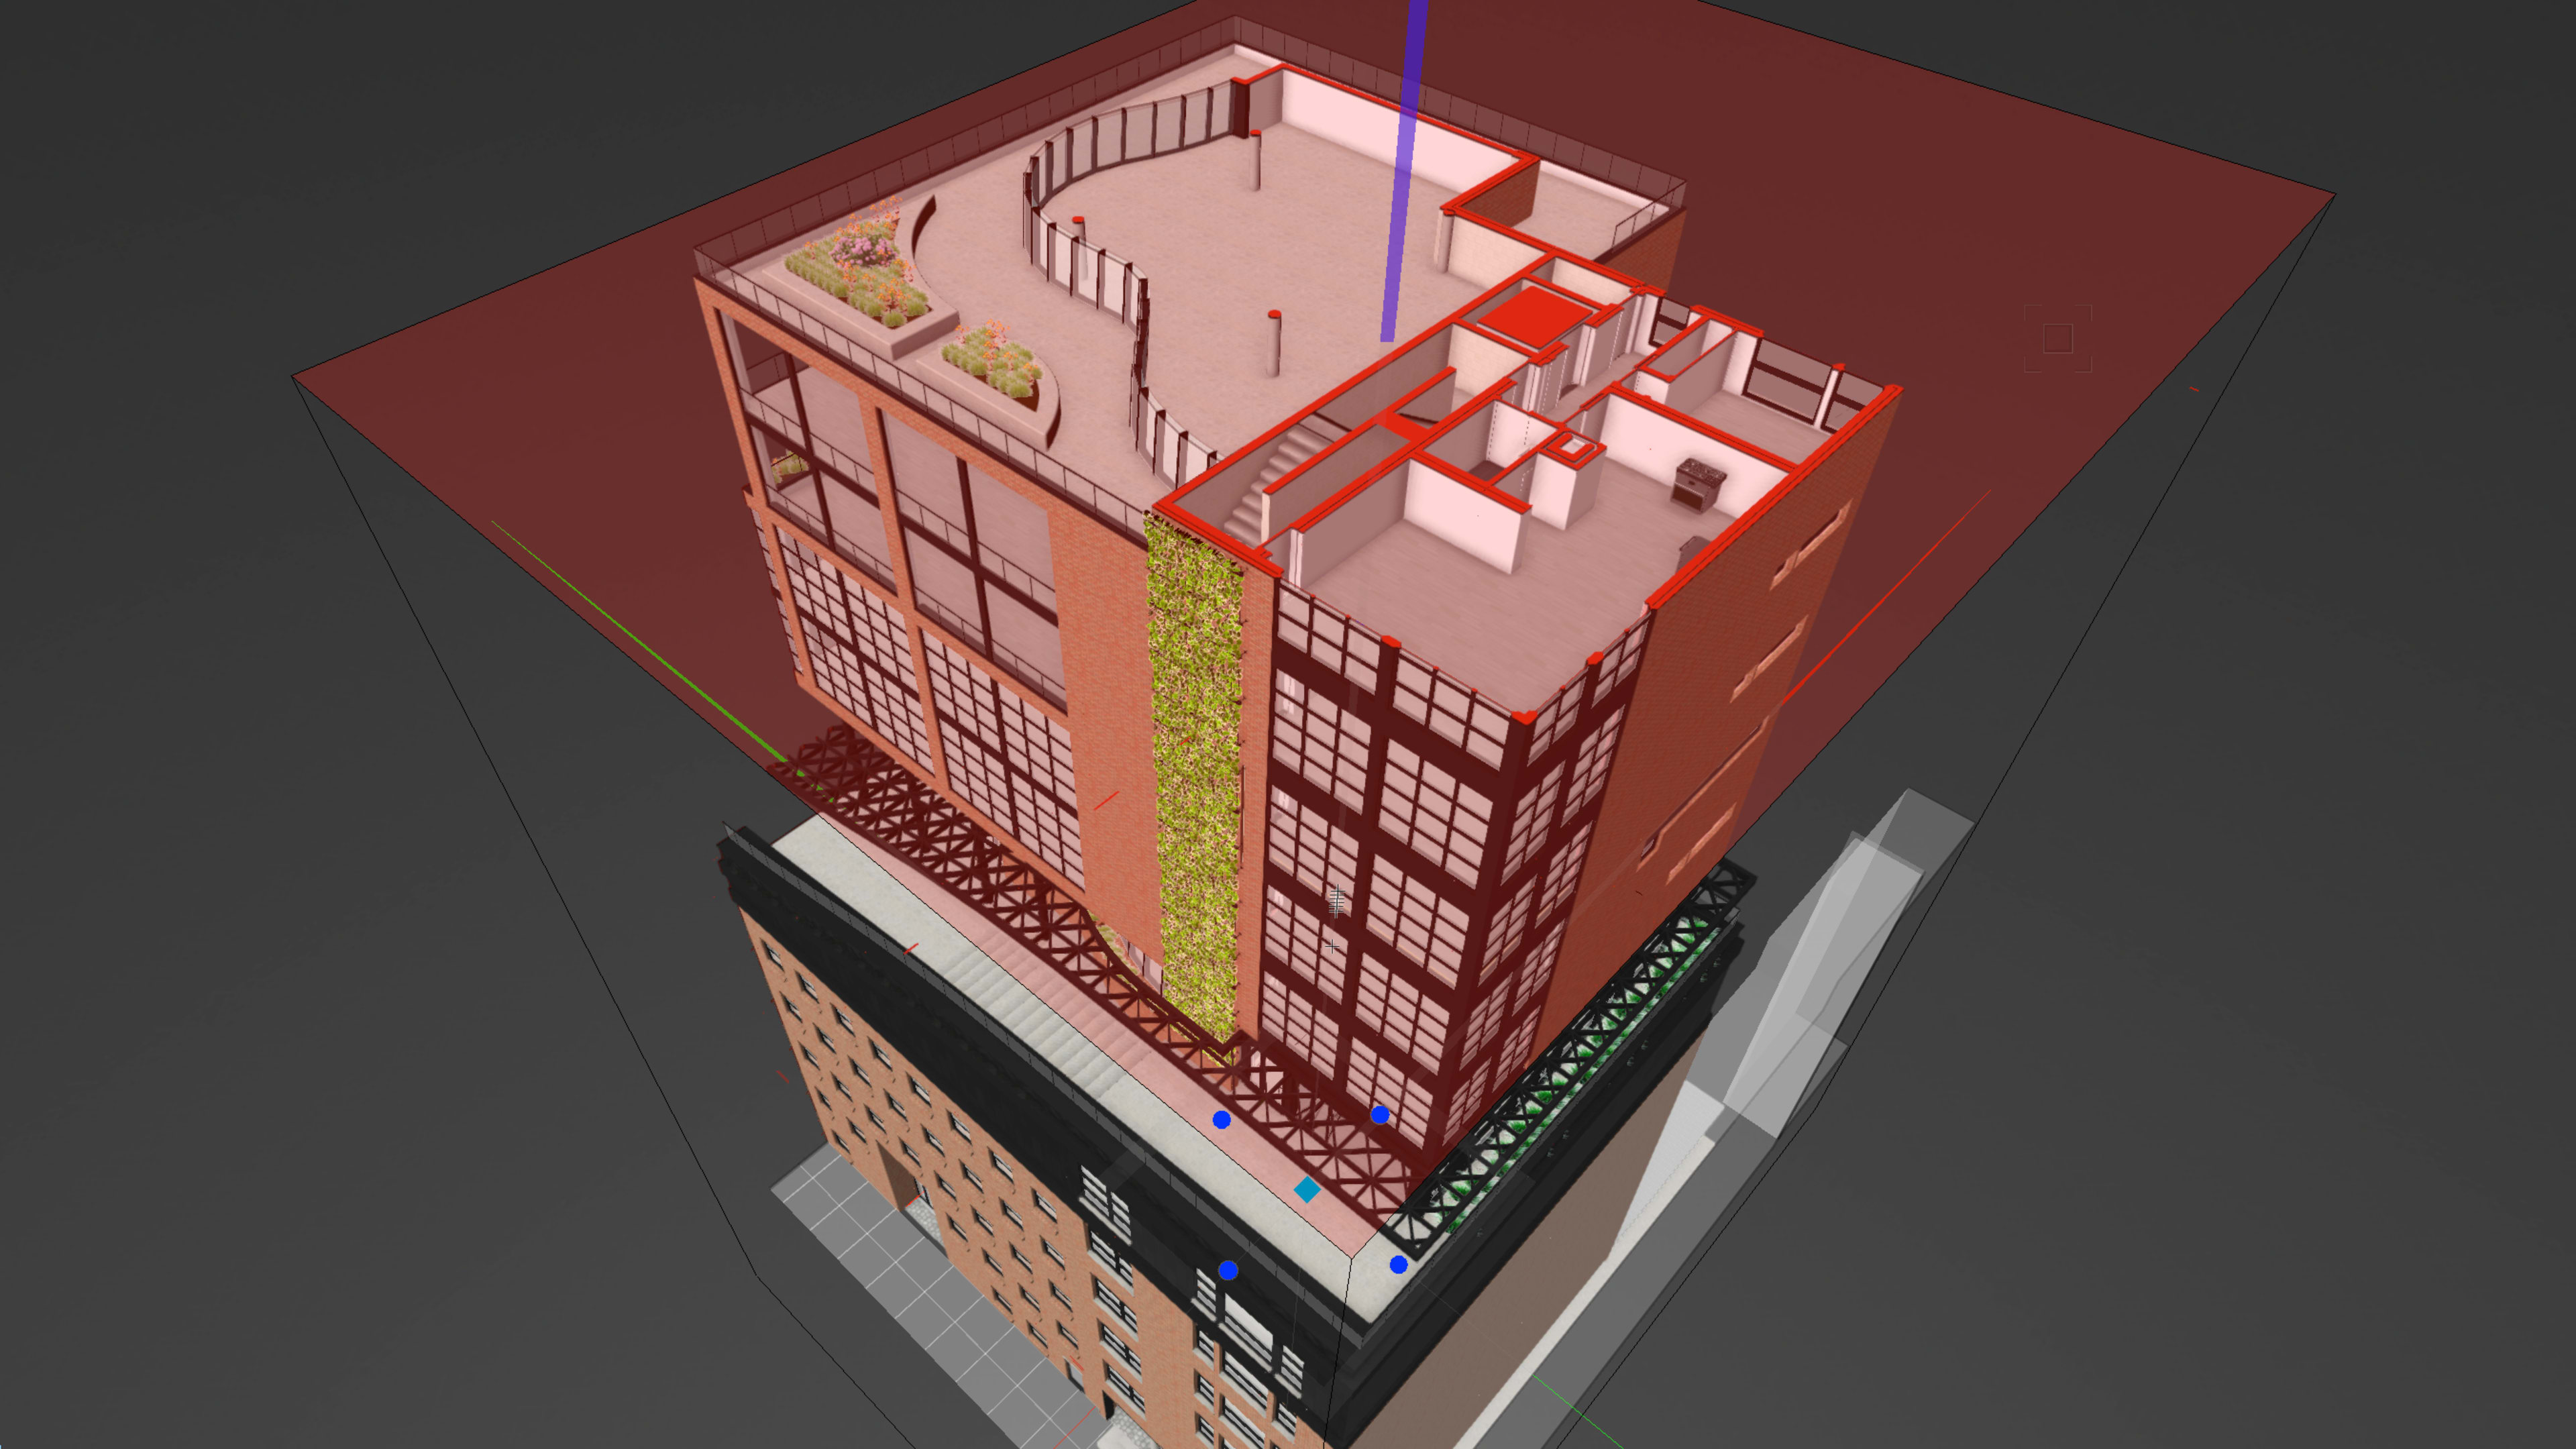
The Clip Cube command allows you to cut away at a 3D model through a translucent cube. Each face of the cube is draggable, giving you six distinct directions from which to clip the model. Clipping the model is strictly a viewing option, meaning anything you clip away will still be intact once you deactivate the tool.
Because the Clip Cube command is purely a viewing aid, you retain complete confidence that your model stays intact with no duplicate files, no alternate versions, and no extra cleanup.
Getting Started: Turing Clip Cube On
Using the Clip Cube is simple, and it’s available in the 3D views you already use every day.
To start:
1. Switch to a 3D View on a design layer, such as a standard isometric or a custom 3D view.
2. Turn on Clip Cube from the View menu or the Quick Preference settings. (You can also pin the Clip Cube quick preference to the toolbar at the top right of your screen for easy access.)
3. A cube appears around your model, ready to be adjusted.
You can start with the entire model inside the cube, or you can focus on a specific area from the beginning. If you select one or more objects first and then enable Clip Cube, Vectorworks automatically creates a cube that tightly wraps your selection, which is perfect for isolating a stair core, a planting area, or a piece of scenic equipment.

Controlling the Clip Cube
Once the cube displays, you can move, resize, and rotate it to get the exact cut you need:
1. Resize the clip by dragging any face, edge, or corner of the cube to reveal more or less of the model.
2. Move the clip by dragging the cube’s center control point; this lets you “slide” the clipped window through your model without changing its size.
3. Rotate the cube when your building or object isn’t aligned to the world axes, so your cut follows the geometry instead of the global X/Y/Z grid.
This control makes Clip Cube especially useful in projects with angled wings, rotated floorplates, or site-sensitive geometry, where conventional orthogonal sections can’t easily align with the real design.
For day-to-day work, Clip Cube becomes a natural part of how you navigate:
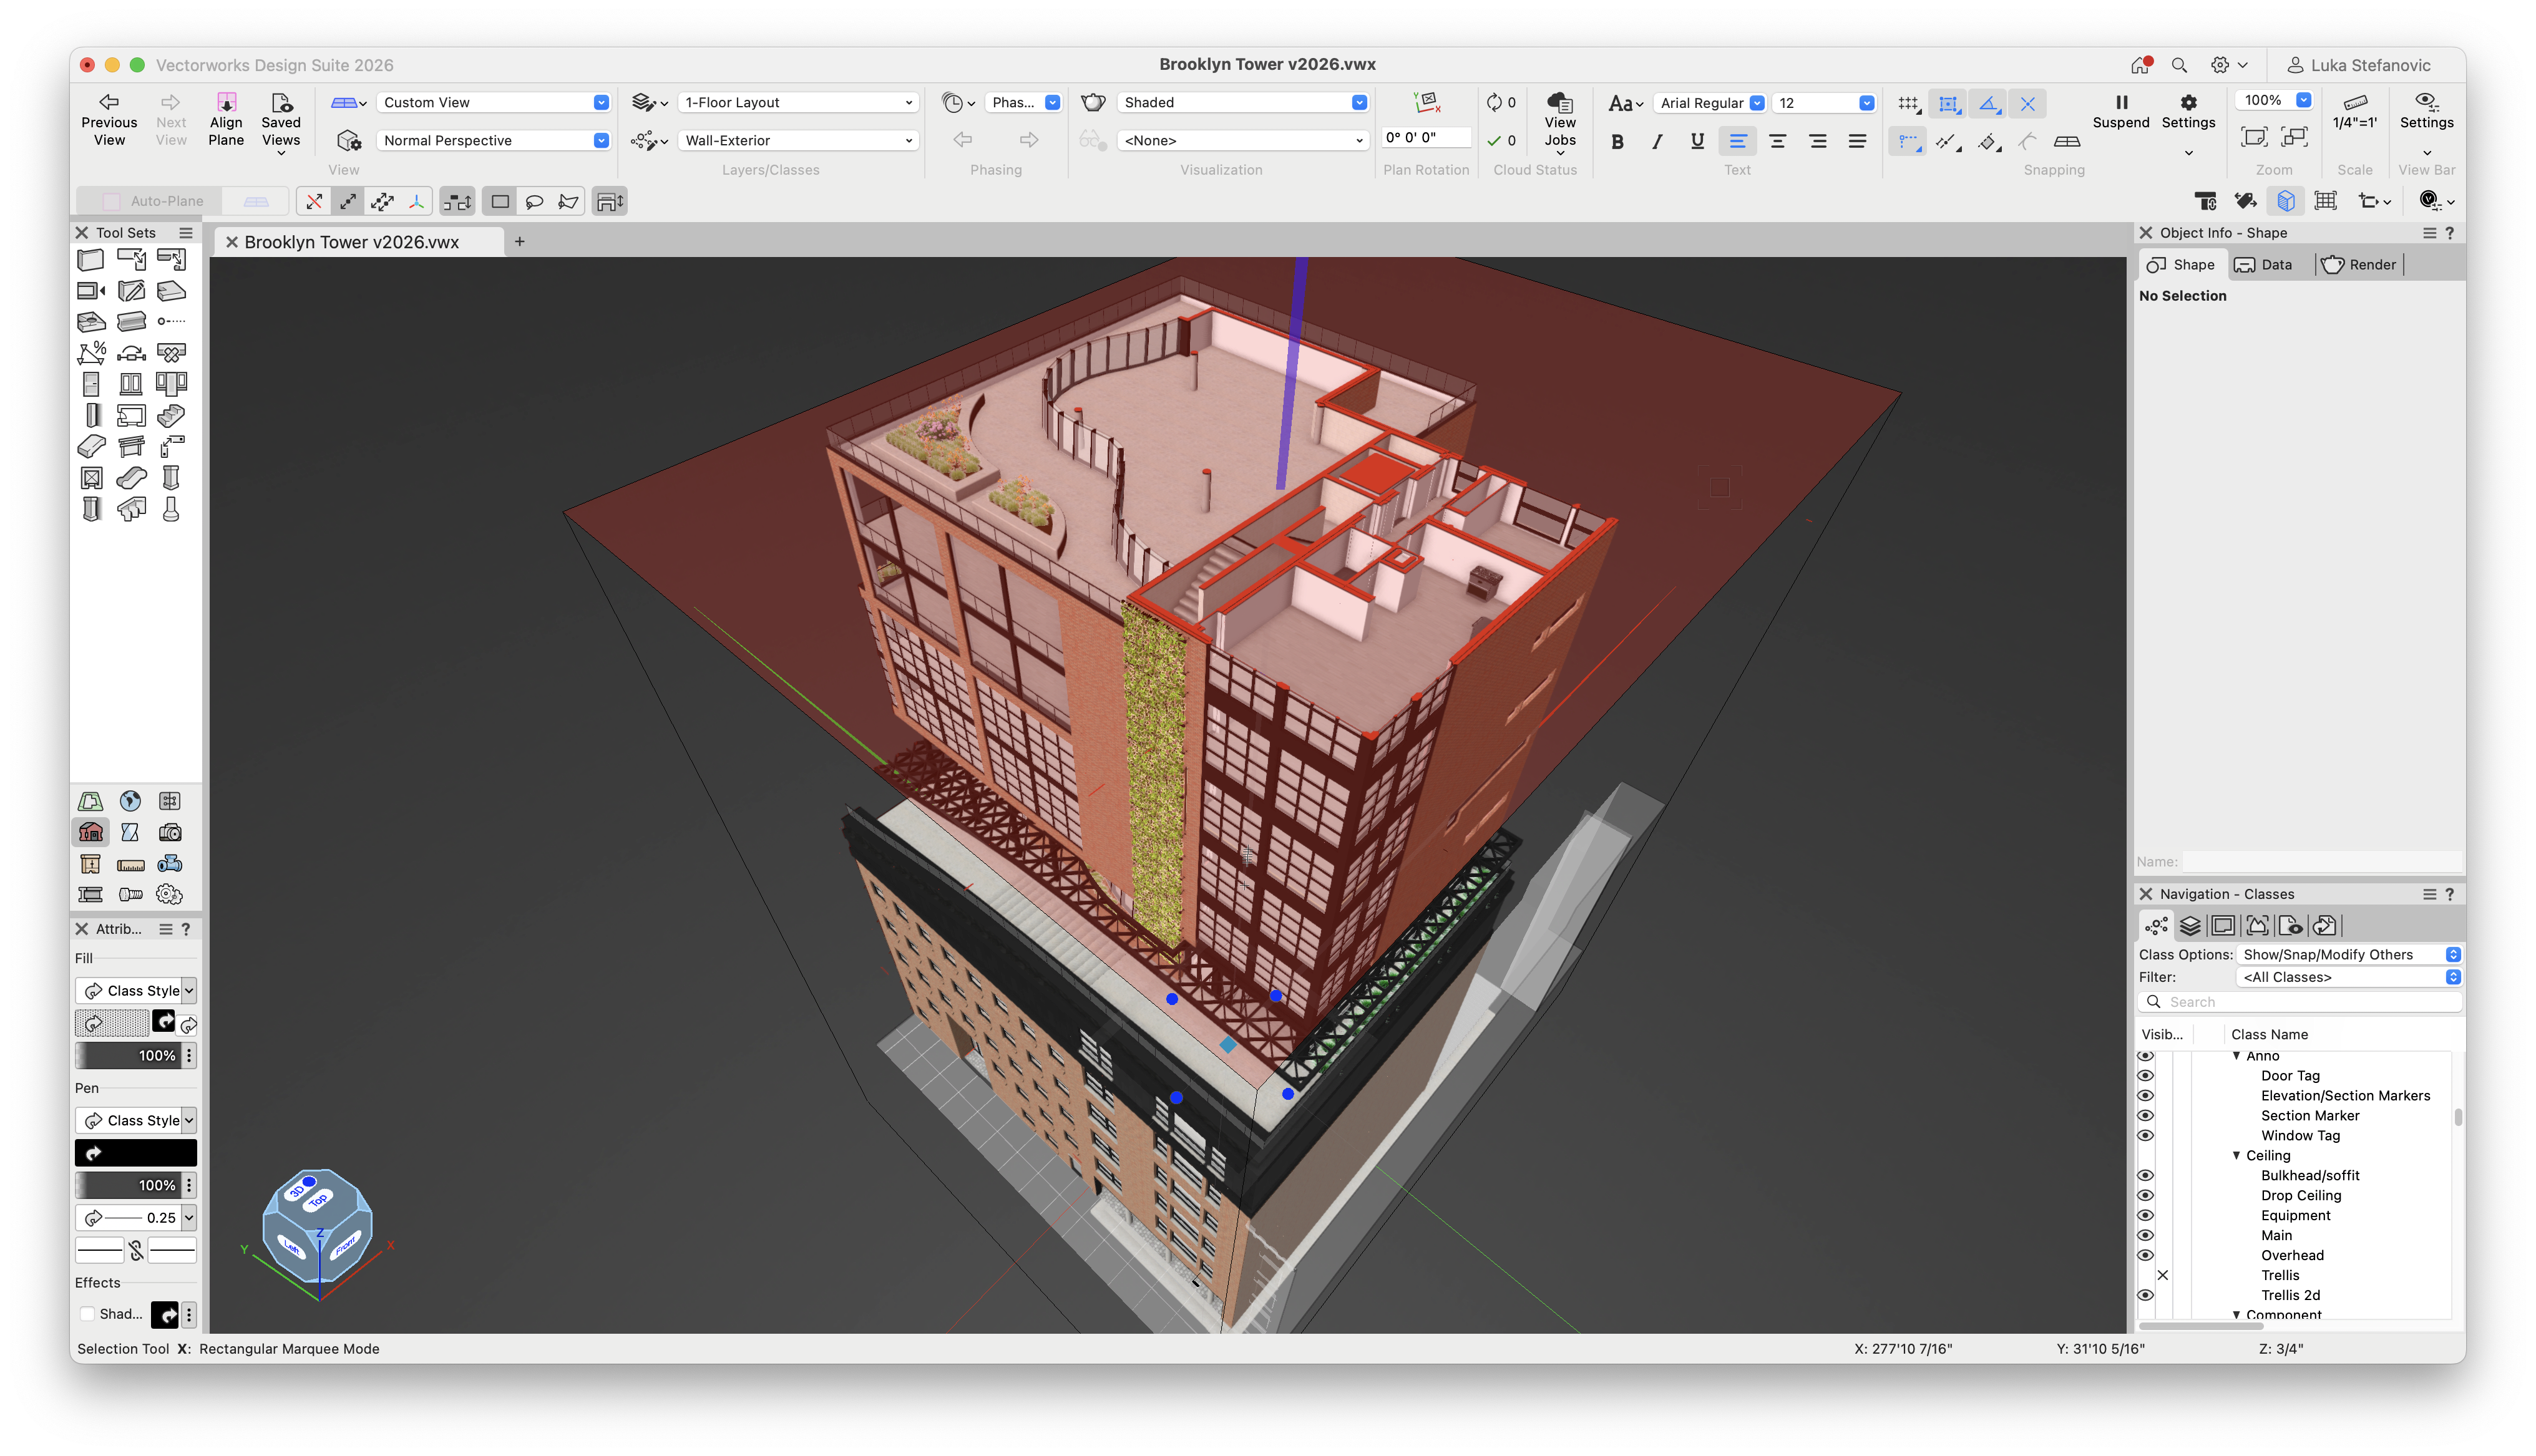
• Sliding the cube up through a multi-story building to review each level in context.
• Rotating and narrowing the cube to understand how a complex rig passes beneath a balcony.
• Tightening the cube around a landscape feature to coordinate grading, planting, and hardscape details in one view.
What You Can Do with Clip Cube
Model Exploration
Clip Cube is a simple way to explore a design; you can clip the model to focus on a particular spot, reducing clutter around the targeted area.
Only visible geometry is snappable when using the Clip Cube. This can give you greater control if you want to focus on a particular room of a large residential project, part of a set design, or area in a site model.
You can also save Clip Cubes to reference later. Do so with View > Save View and select the Save View Orientation option. This is a fast way to essentially place a bookmark into the model.
Visualization
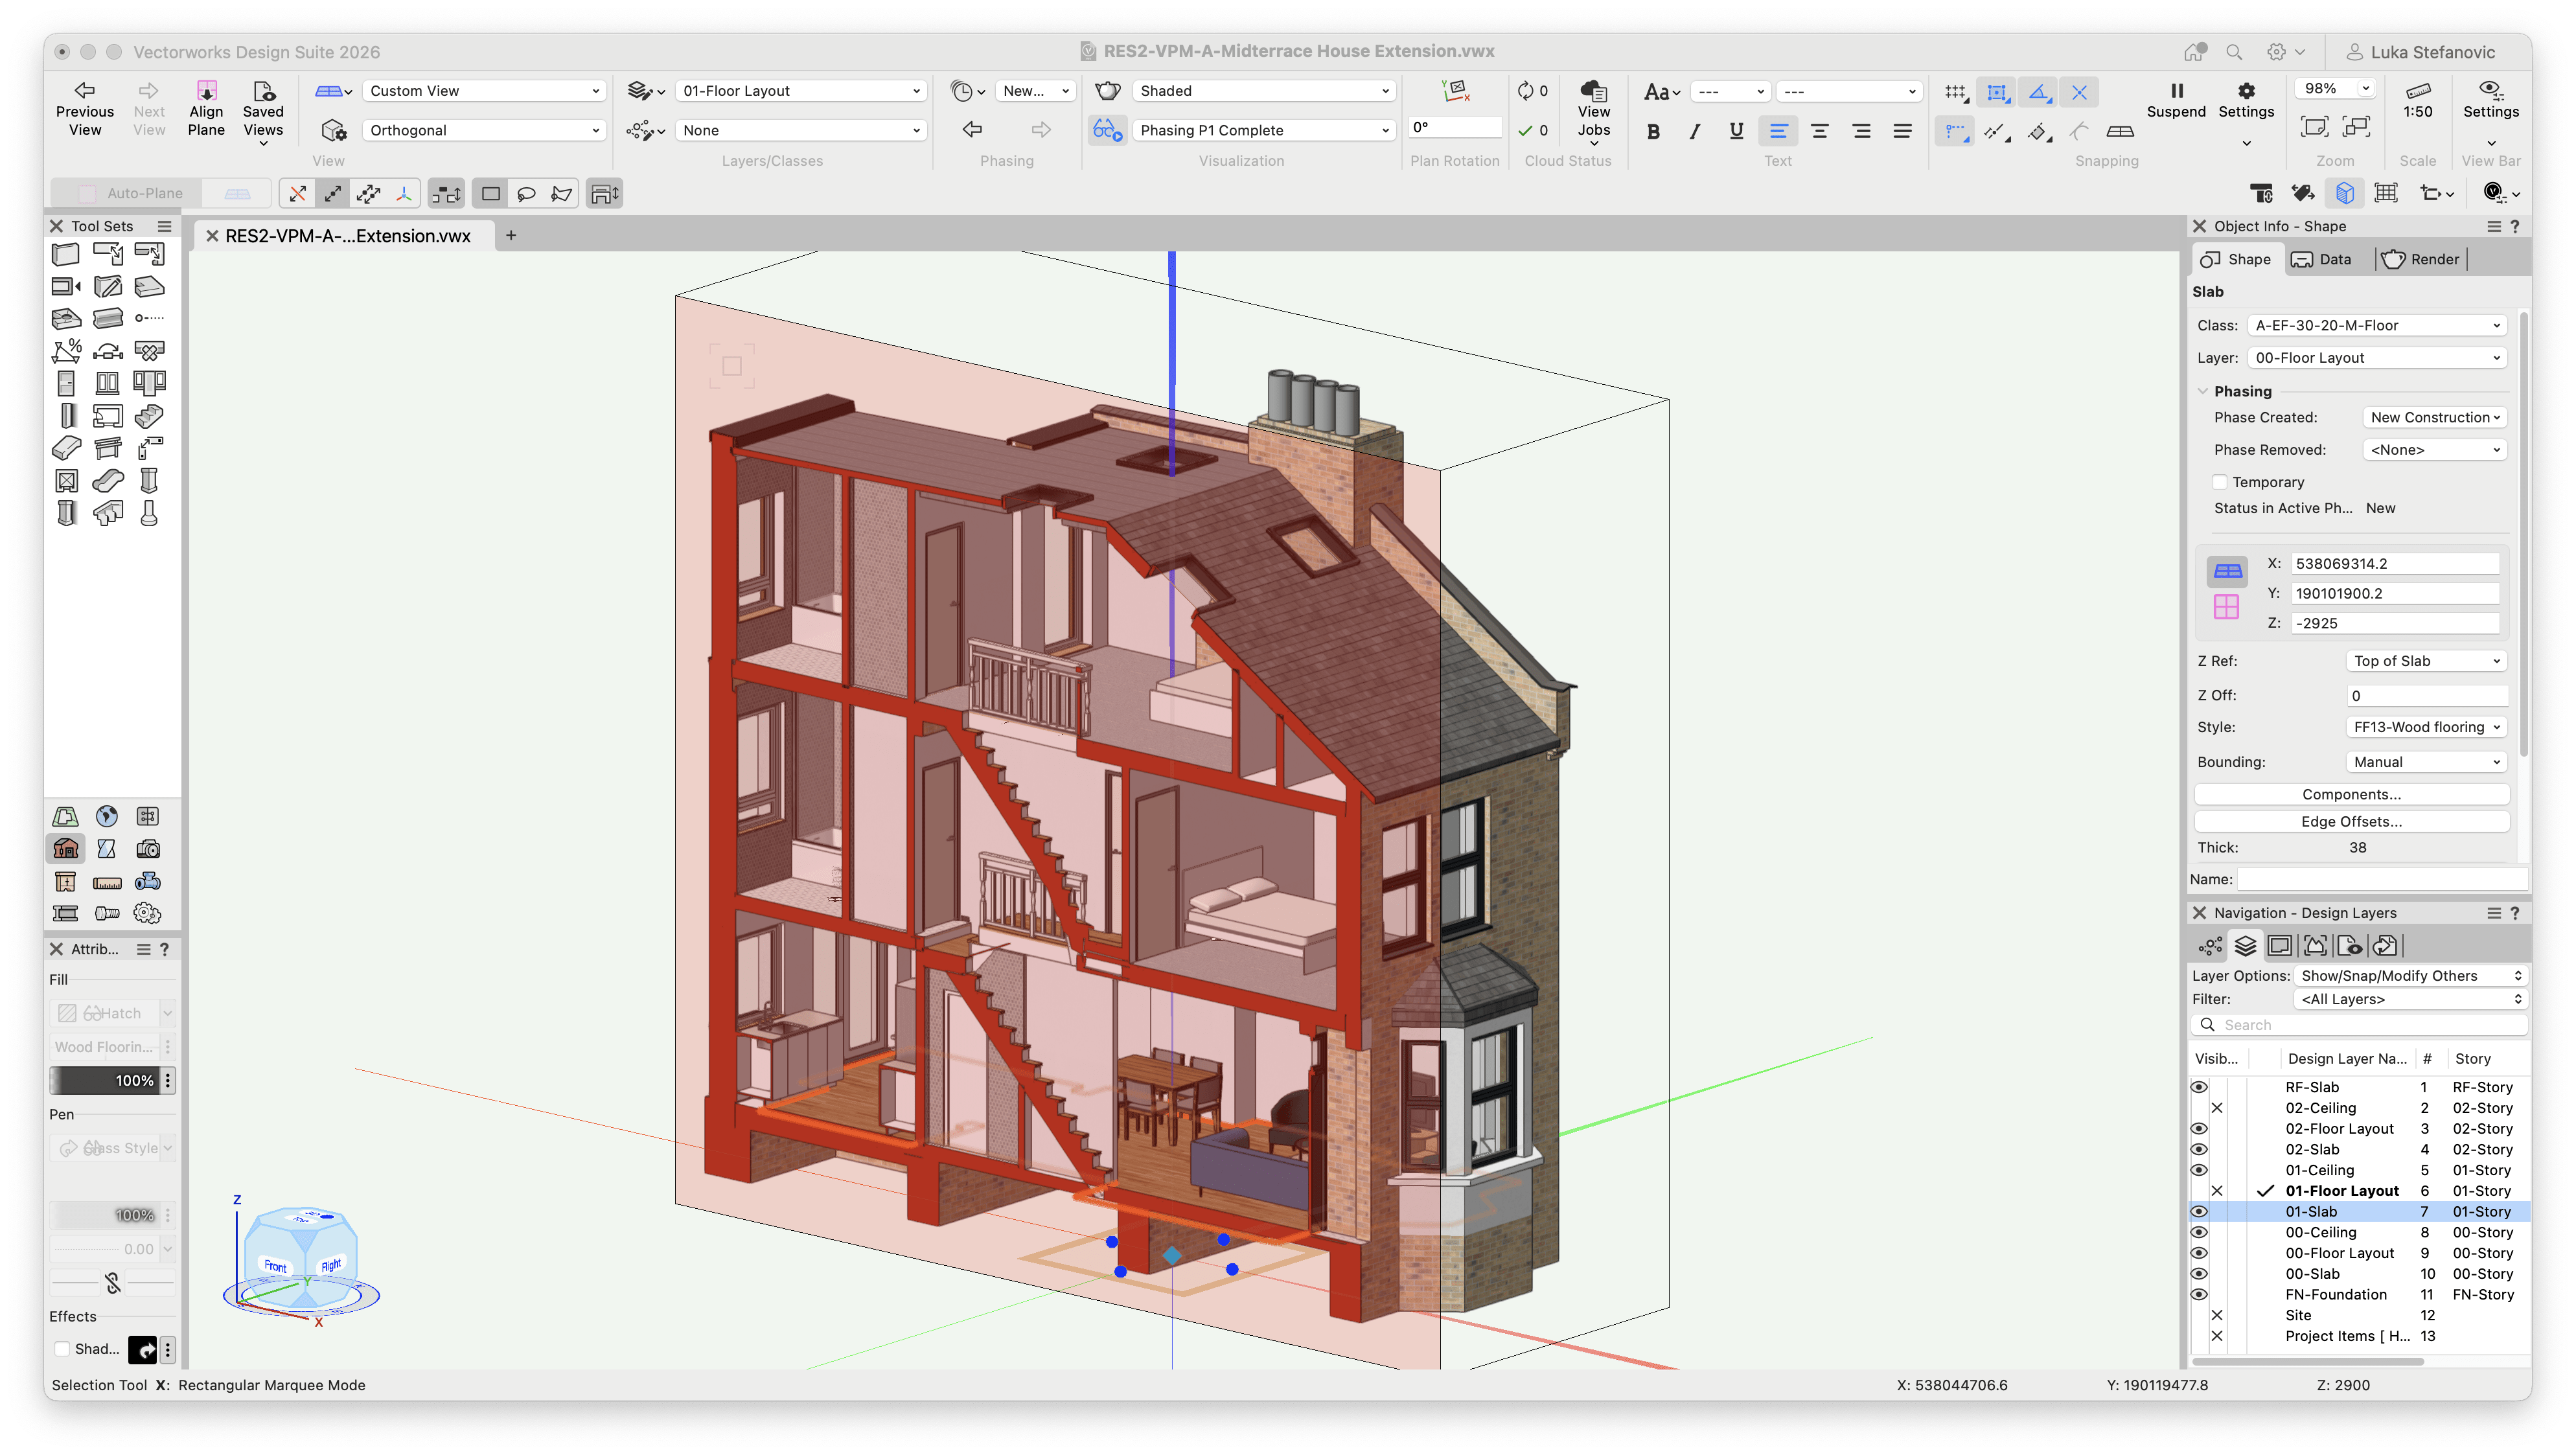
The Clip Cube view can be created as a viewport in the usual manner with View -> Create Viewport. Make sure the Display with Clip Cube box is checked in the dialog box.
You can also edit the Clip Cube within a Viewport. Right-click a viewport and click Edit. Make sure Display with Clip Cube is checked, then click OK. You’ll then be able to quickly clip away at the viewport geometry.
Create Section Viewports
Clip Cube can help create section viewports quickly and easily. This is arguably the most underrated use of Clip Cube. Here’s how to do it:
1. Clip out geometry you don’t want to show in the section.
2. Select any cube face.
3. Right-click on the selected face and click the Create Section Viewport command from the pop-up menu.
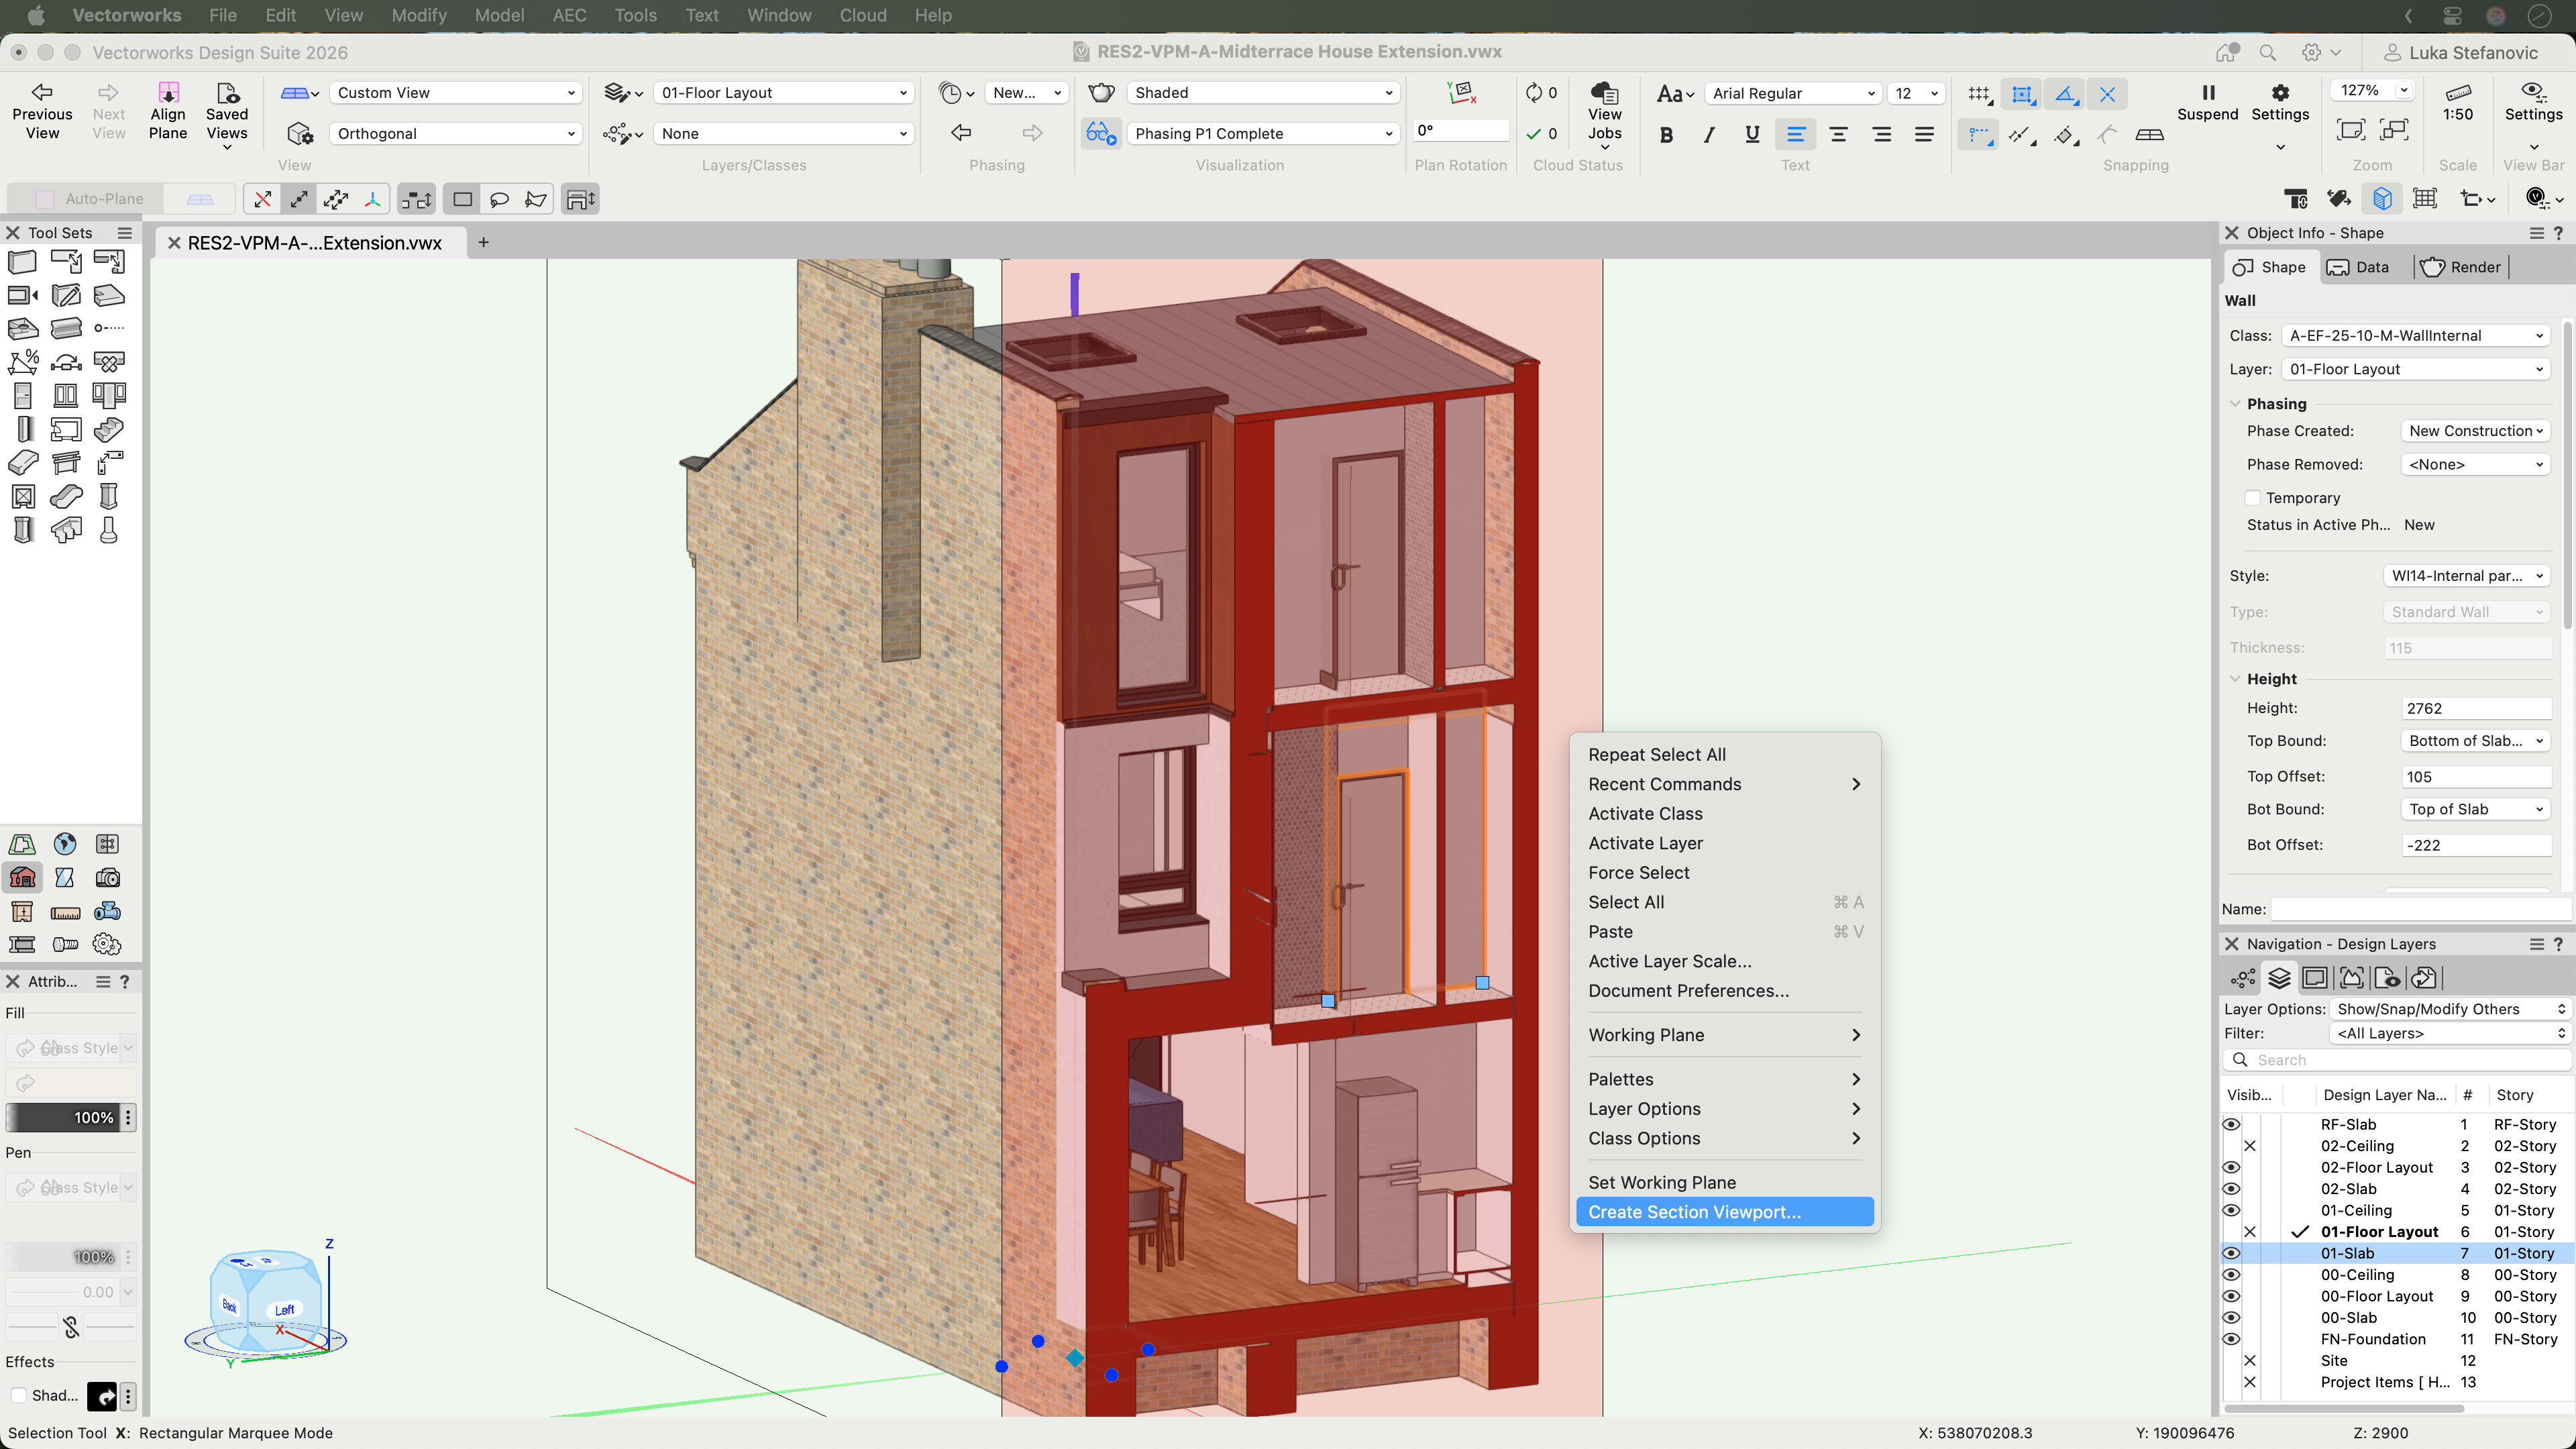
A section viewport uses the cube face as the cut plane and the crop of your view. Beyond the cut plane, it includes only the geometry within the Clip Cube. You can find more information about creating section viewports here.
Why Clip Cube Belongs in Your Everyday Design Toolkit
Clip Cube is one of those features that feels simple the first time you use it, but the more you rely on it, the more it reshapes how you design, coordinate, and present in Vectorworks.
By giving you an intuitive way to explore your model, capture focused views, and generate section viewports, Clip Cube helps you remove visual noise so the strength of your ideas can come through clearly.
Sharpening Visuals with Modern Rendering
Clip Cube isn’t just about analysis; It’s also a powerful presentation tool, especially when you pair it with modern rendering options in Vectorworks design software.
Use Clip Cube with Shaded or Hidden Line viewports to generate legible, detail-rich cutaway views that reveal structure, systems, and interior finishes at a glance.
When you combine Clip Cube with Depth Cueing in supported view modes, you can subtly fade distant objects and keep the clipped region front and center visually, making it easier for your audience to read the drawing.
You can also leverage live rendering workflows, including enhanced support for Maxon Redshift for Vectorworks in Vectorworks 2026 Update 4, to present real-time, clipped 3D views during client meetings and internal reviews. The result is a set of drawings and presentations that feel both technically precise and visually compelling, which is perfect for communicating your design intent to clients and collaborators.
RENDERING WITH VECTORWORKS AND REDSHIFT
Learn more about real-time rendering with Maxon Redshift for Vectorworks.
Stay in the know with the latest insights
Subscribers receive news, customer stories, success and learning tips, event information, and other important announcements from Vectorworks.
By submitting this form, you agree that Vectorworks, Inc. and its authorized partners may contact you in regards to news, offers, and the use of our software, services, and platforms. Learn more about our privacy practices and your data on our privacy page.*