
If you’re planning to build a house, add a room, or replace your roof, you’ll likely hear the term roof plan. But what exactly is it, and why does it matter? In this article, you’ll explore what a roof plan is, why it’s helpful, and how it can make your project go a lot smoother.
What Is a Roof Plan?
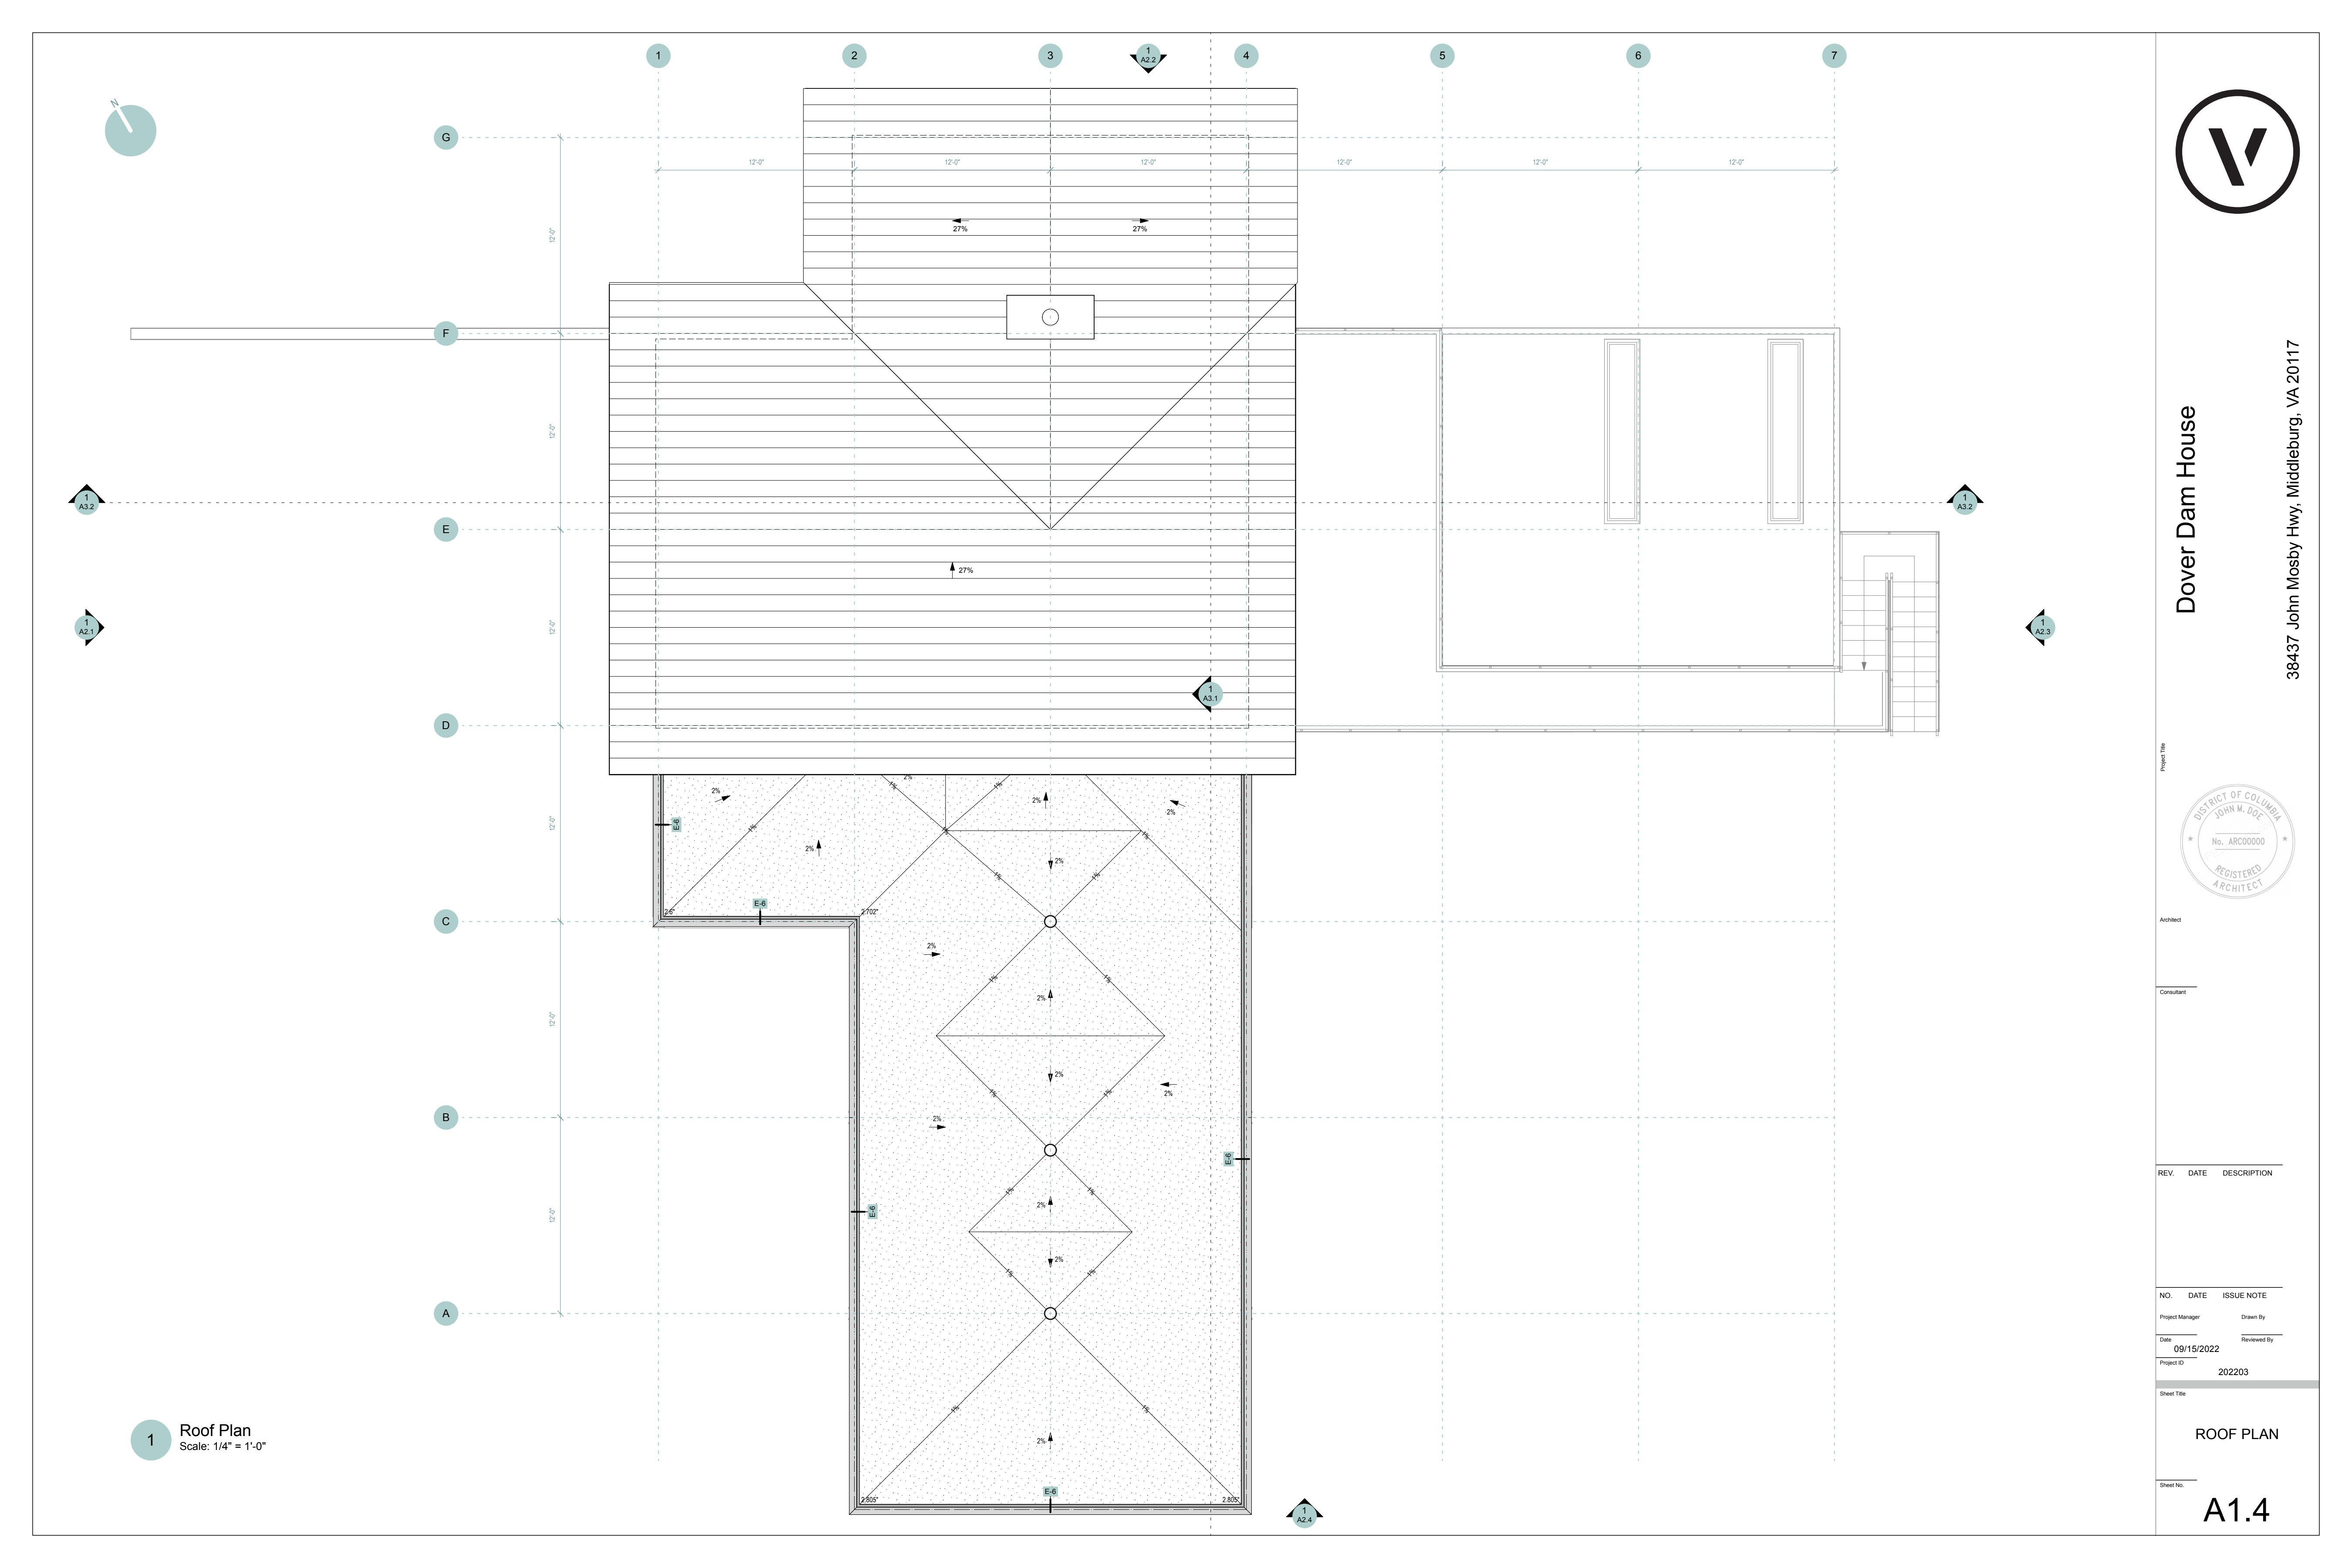
A roof plan is a scaled drawing that shows the shape, layout, and features of a roof from a top-down view. It can include details like slopes, ridges, valleys, drainage, vents, and the placement of materials. Roof plans are used by architects, builders, and contractors to guide construction, repairs, or renovations. They help ensure the roof is structurally sound, properly drained, and compliant with local codes.
The Benefits of Roof Plans
Having a roof plan isn’t just a formality — it’s a practical tool that helps avoid costly mistakes. Here’s how it adds value:
Accuracy in construction: A roof plan gives contractors exact measurements and layouts, reducing guesswork and ensuring everything fits the way it should.
Improved budgeting: With a clear plan, it’s easier to estimate material costs and labor, so there are fewer surprises during the project.
Better communication: Roof plans align homeowners, builders, and inspectors. Everyone sees the same layout, which helps prevent misunderstandings.
Code compliance: Most cities require detailed roof plans for permits. Submitting one speeds up the approval process and keeps the project within legal guidelines.
Future maintenance: A well-documented roof plan makes repairs or upgrades down the road faster and cheaper, since maintenance professionals know exactly what they’re working with.

A 2D roof construction plan created with Vectorworks Architect.
What Are the Key Elements of a Roof Plan?
As mentioned, a roof plan is more than just an outline — it’s a detailed top-down view that communicates how the roof is built, how it functions, and how it integrates with the rest of the structure. Here are the essential components every roof plan should include:
1. Roof outline and shape
This defines the perimeter and form of the roof, whether it’s gabled, hipped, flat, or a combination. The shape gives context to the roof’s geometry and how it fits the building footprint.
2. Slope or pitch indications
Pitch arrows or slope notations show the direction and angle of the roof slopes. These details are critical for drainage, structural planning, and construction accuracy.
3. Dimensions and overhangs
Accurate dimensions, including roof span, ridge lengths, and overhangs, indicate framing, material estimation, and help to comply with local codes.
4. Roof features and penetrations
Elements like skylights, chimneys, vents, solar panels, and HVAC units must be clearly shown. These features affect structural design and waterproofing strategies.
5. Annotations and notes
Callouts, data tags, and notes help explain materials, construction details, and any special conditions. They also communicate design intent to contractors and permit reviewers.
6. Drainage elements
For both pitched and flat roofs, the plan should show gutters, downspouts, scuppers, or internal drains to illustrate how water will be managed.
7. Material indications
While not always required on the main roof plan, it’s helpful to note roofing materials such as asphalt shingles, standing seam metal, or membrane roofing, especially for permit sets or client presentations.
Including these elements leads to a roof plan that is complete, clear, and ready for use in design development, permitting, or construction documentation. Whether you’re using Vectorworks Architect or another CAD/BIM platform, these components form the foundation of a professional roof plan drawing.
Steps to Create a Roof Plan in Vectorworks Architect
Creating a roof plan in Vectorworks Architect requires a clear understanding of your design goals and tools to create accurate documentation. Whether you’re preparing construction documentation or developing a visual presentation, having a solid process helps ensure accuracy and clarity. Here’s a step-by-step breakdown on how to create a detailed roof plan using Vectorworks. For more details on using Vectorworks Architect, visit the free online Vectorworks Help.
A roof plan created with Vectorworks Architect.
1. Identify and Gather the Key Information Required for a Roof Plan
Start by gathering all the key elements your roof plan needs to communicate. At a minimum, this should include the roof outline, pitch or slope indicators, dimensions, overhangs, and any features like skylights, chimneys, or vents. Don’t forget to include drainage elements if applicable, as well as notes, annotations, and material indicators when relevant.
2. Choose the Right Tools in Vectorworks Architect
Next, select the right tools in Vectorworks Architect based on the type of roof you’re designing. For most standard pitched roofs, the Roof Object tool is ideal. If you’re working with segmented or non-standard slopes, the Roof Face tool offers more control. For flat roofs, use the Slab tool, optionally paired with the Slab Drainage tool, to define water flow. For highly customized or complex forms — like curved or “eyebrow” roofs — 3D modeling tools may be necessary to build the shape before integrating it into your plan.
3. Create the Roof Geometry
With tools identified, move on to creating the roof geometry. Use the Roof Object or Roof Face tools to define perimeter boundaries and set slope values for pitched roofs. For flat roofs, build your slab and apply drainage gradients as needed. If you’re creating a custom shape, model it directly in 3D and then align it with the building footprint.
Learn more about creating roof objects in Vectorworks Architect here.
4. Add Roof Features and Openings
Once the roof form is in place, add features and openings. Insert skylights, chimneys, and other elements using symbols. Skylights, for instance, are symbol-based and can be easily integrated into the roof object. Gable details may require manual placement of windows or other architectural components depending on the roof’s complexity.
5. Annotate and Dimension the Plan
Add dimensions using dimensioning tools for lengths, pitches, and overhangs. Add callouts, notes, and data tags to clarify materials and construction details.
6. Compose the Drawing for Presentation
Set up your Viewports so they show building outlines below the roof, which helps highlight overhangs. Choose top/plan view for a 2D line drawing, or choose a rendering mode — like Hidden Line — to enhance visibility of hatches and shadows. Decide whether the final output will be a clean technical plan or a visually rich version for clients, sun studies, or marketing.
7. Finalize the Document
Check for completeness, making sure all elements are accounted for and correctly annotated. If detailed roof sections are required, include them as separate sheets — but keep the roof plan focused on top-down information.
Tips: Don’t be afraid to combine 2D and 3D methods — Vectorworks is flexible. Tailor your drawing to its intended audience, whether that’s a contractor, a permitting office, or a client. And for advanced presentations, consider adding rendered views or shadow studies to give more context.
Stay in the know with the latest insights
Subscribers receive news, customer stories, success and learning tips, event information, and other important announcements from Vectorworks.
By submitting this form, you agree that Vectorworks, Inc. and its authorized partners may contact you in regards to news, offers, and the use of our software, services, and platforms. Learn more about our privacy practices and your data on our privacy page.*