Effective communication and compelling visualization are essential in any aspect of entertainment design, whether you're crafting a stage production, concert, or corporate event.
Vectorworks Spotlight’s animation tools help bridge the gap between static drawings and immersive presentations. Creating dynamic walkthroughs, orbit paths, and solar animations can enhance collaboration, streamline decision-making, and identify potential issues before arriving on-site.
Continue reading to learn more.
Uses of Animations in Vectorworks Spotlight
Animations serve multiple purposes in entertainment and live event design. They help your collaborators understand the design with fluid camera movements, allowing clients to visualize the space more effectively.
Previsualization enables you to assess sightlines, lighting placements, and stage movements, helping you make sure the design functions as intended. Additionally, animated walkthroughs can be shared with colleagues for collaborative reviews, streamlined feedback, and coordination throughout the design process.
Types of Animations in Vectorworks Spotlight
Walkthrough Animations
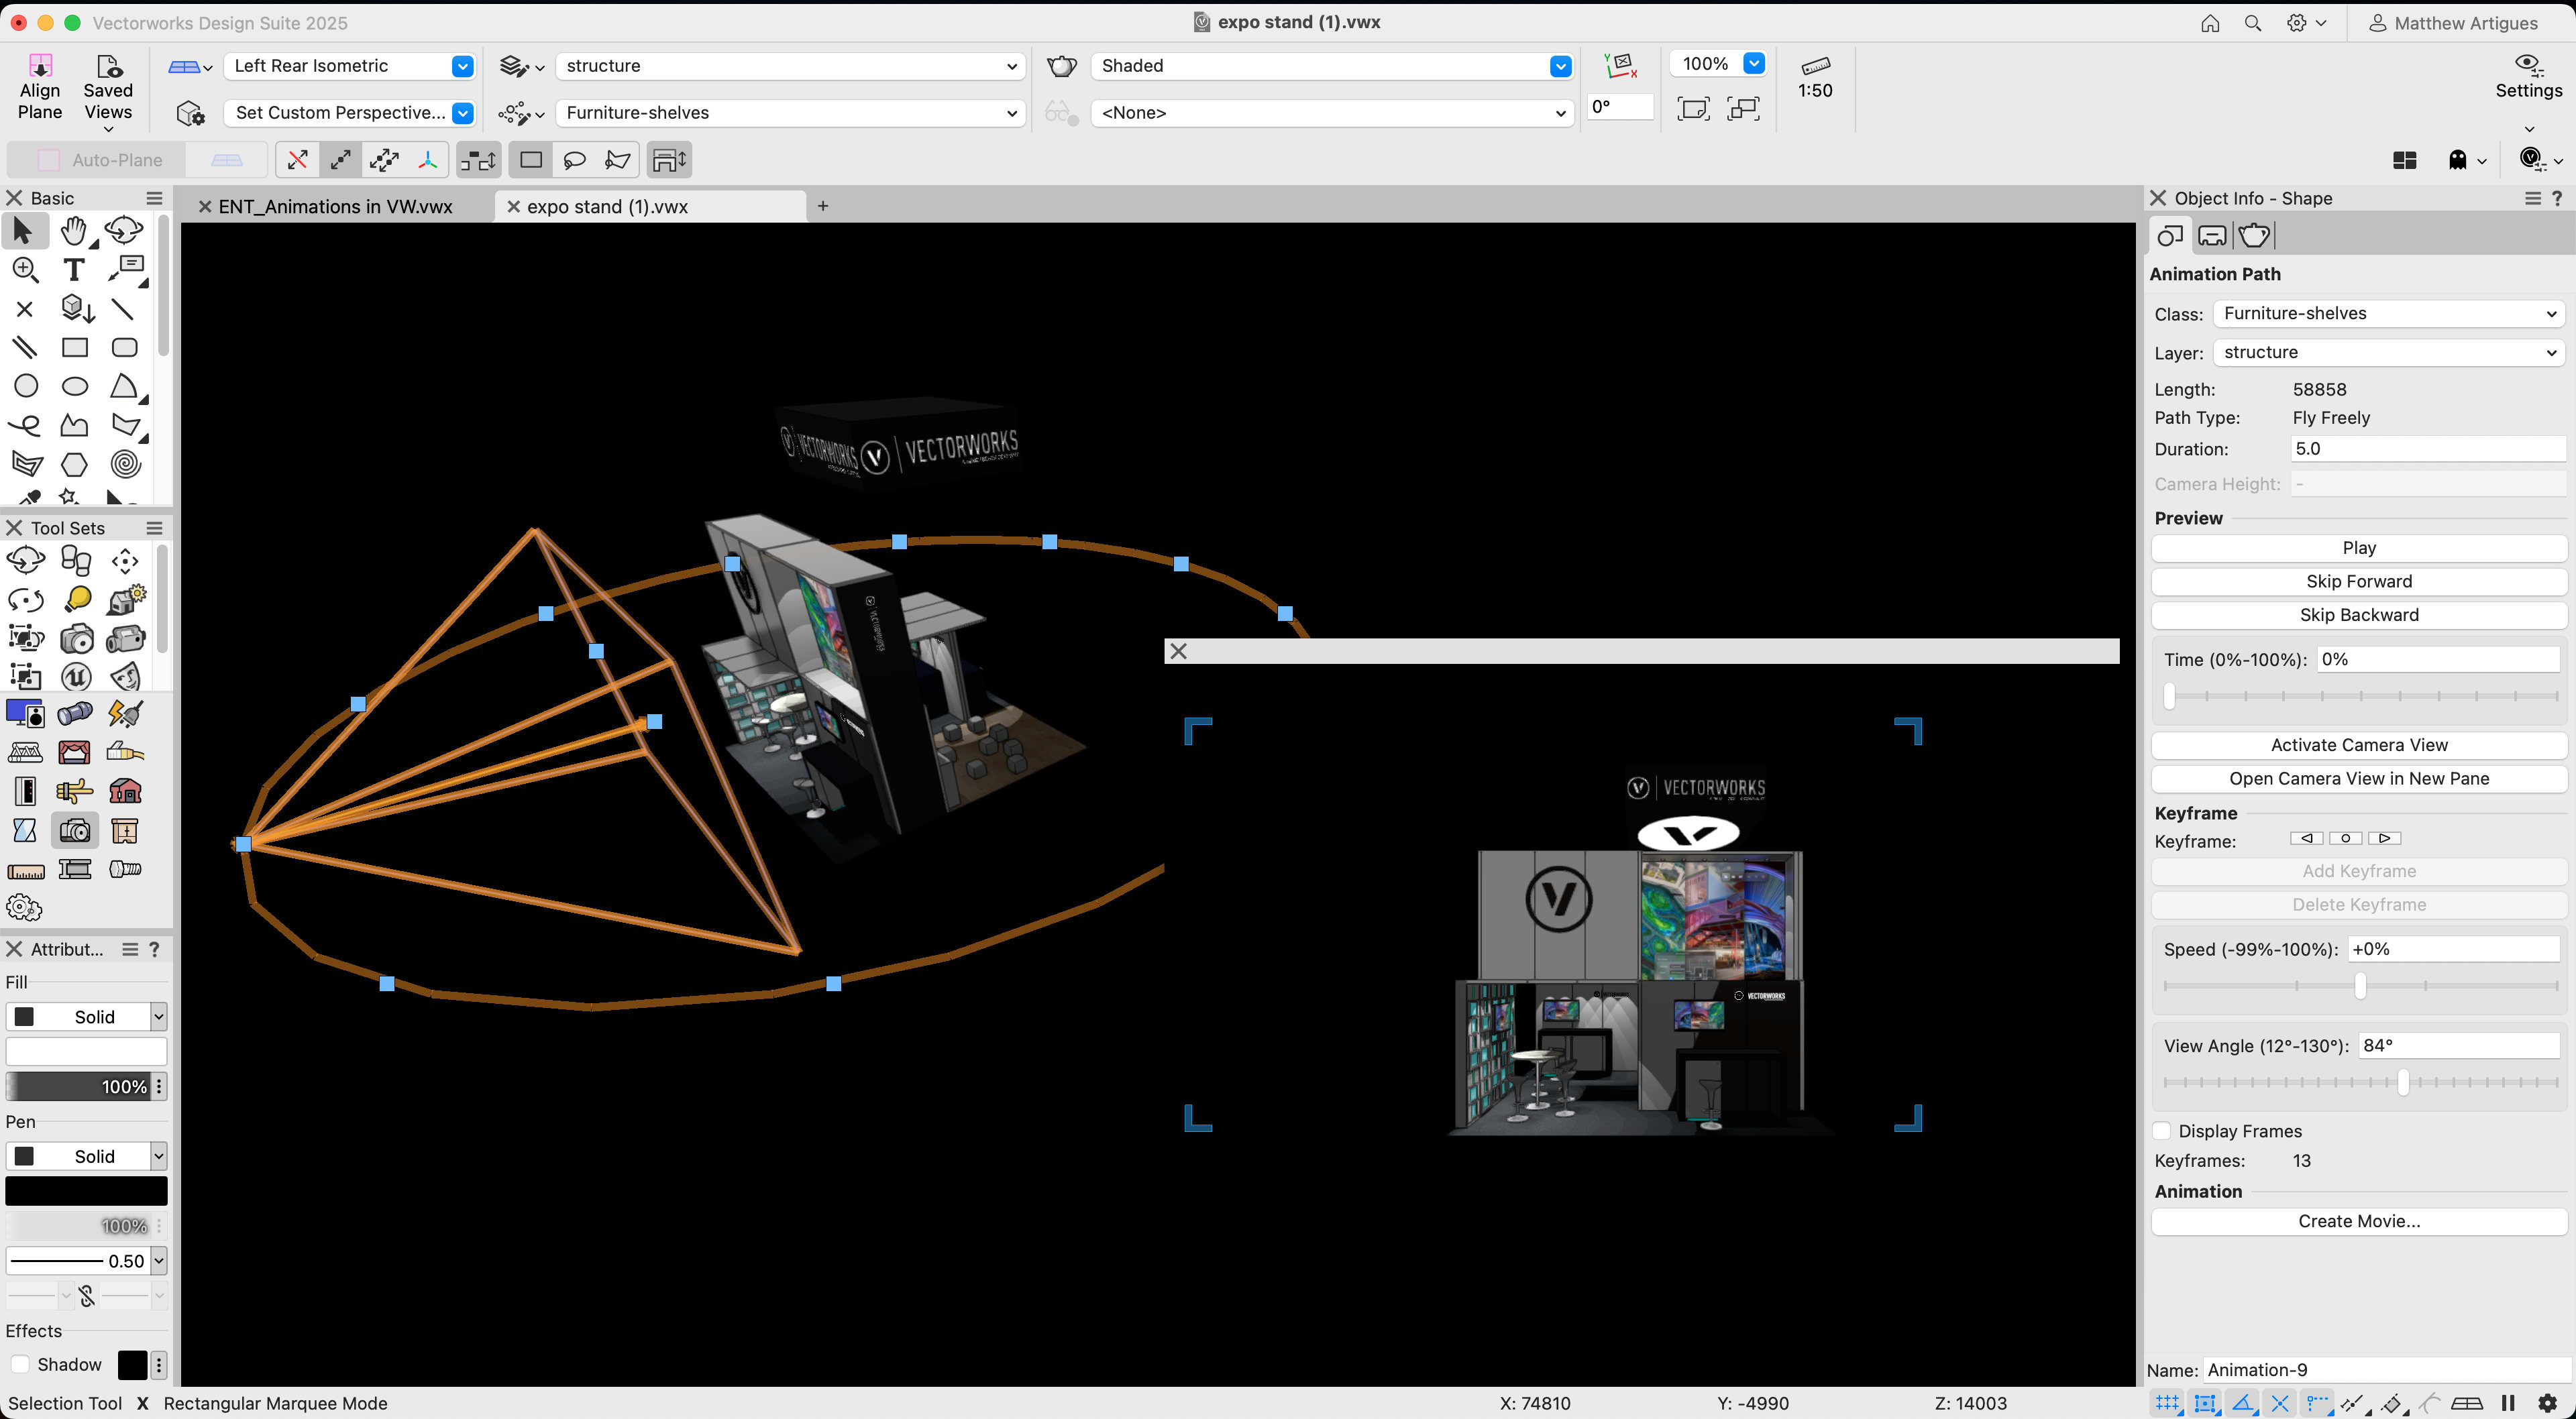
Walkthrough Animations from a Selected Path object allow for guided movements through your 3D design space. These animations follow a predefined path and are easy to use for your entertainment projects.
To create Walkthrough Animations from Selected Path objects:
1. Draw a Planar or 3D Path object, whether it’s a line, arc, polyline, polygon, or NURBS curve.
2. Adjust the path direction using the Reverse Direction option in the Object Info palette if necessary.
3. Select the Create Walkthrough Path from Selection command under Model > Create Animation.
4. Depending on the Source Path object, a Walk or Fly Freely animation path is created. Walk paths follow active-layer terrain but can’t span multiple layers.
5. Keyframes are automatically added at corners and curves for smoother transitions for your animations.

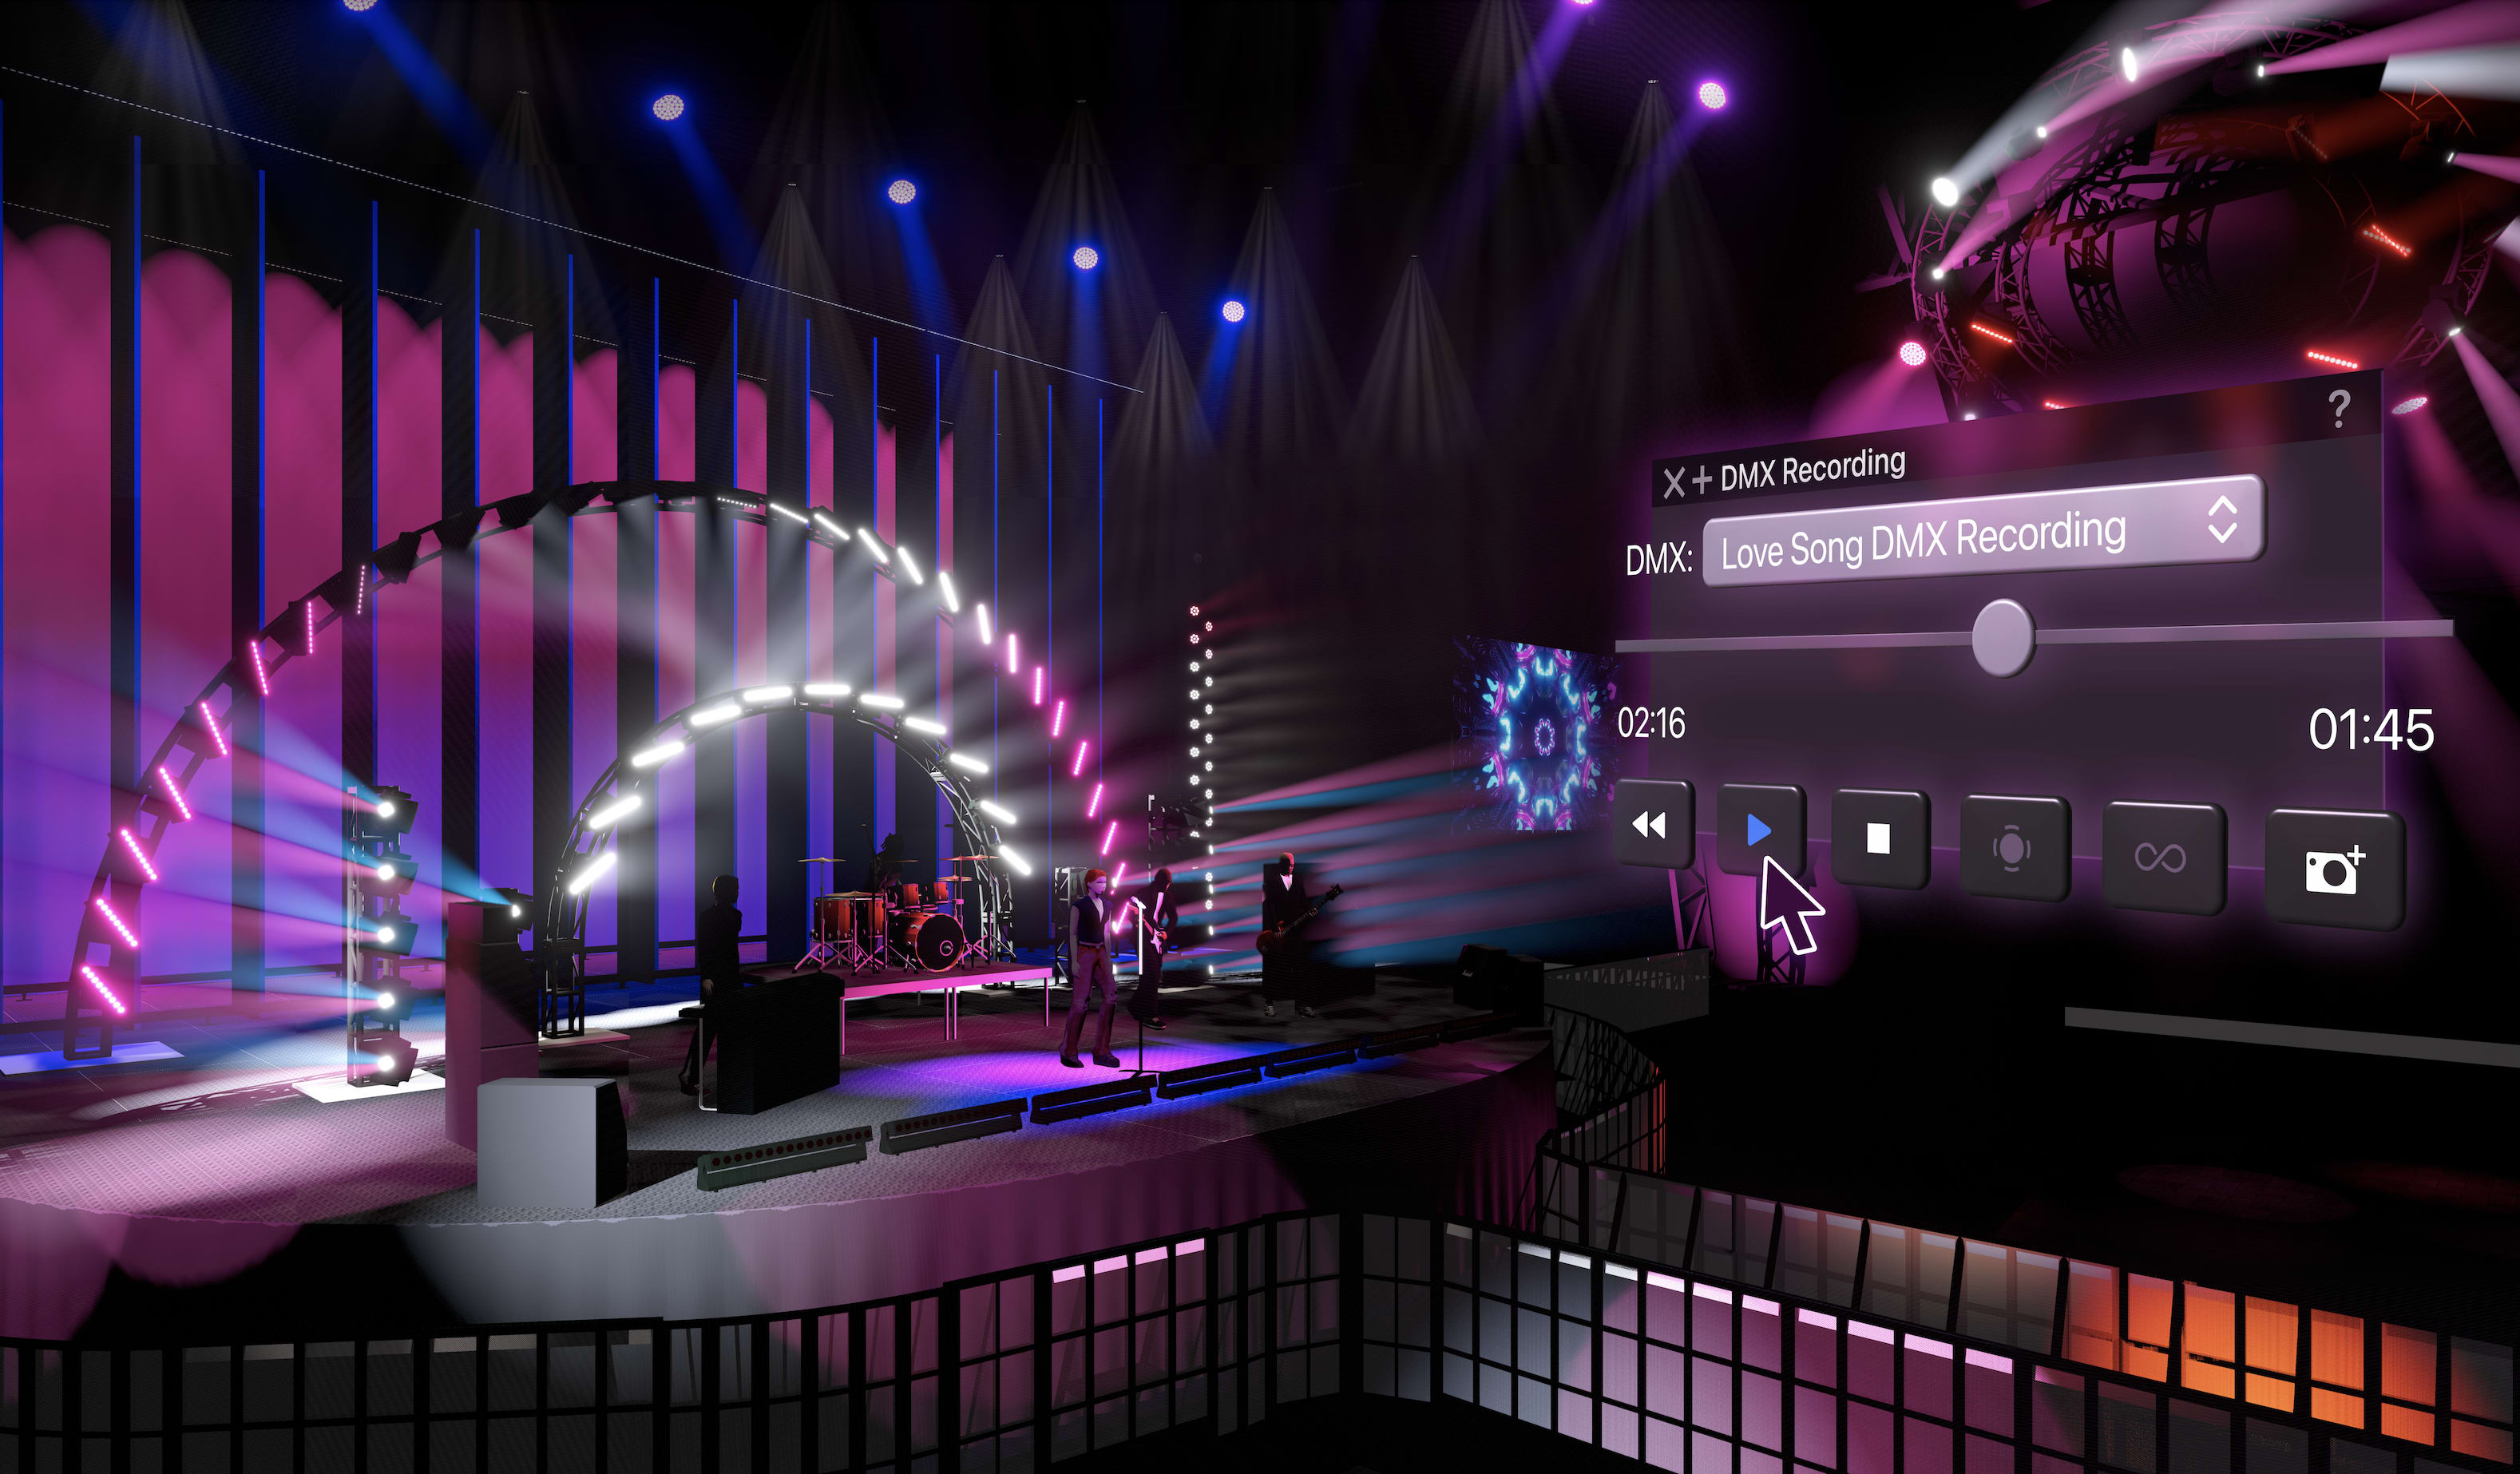
Walkthrough Path from Selection.
You can also create Walkthrough Animations by connecting a series of Saved Views:
1. Create a Saved View for each desired camera view along the Animation Path.
2. Make sure the drawing is in a perspective view using features like the Walkthrough or Flyover tools.
3. Use the Create Walkthrough Path from Saved Views command under Model > Create Animation.
4. Select the Saved Views you’d like to include in the path and reorder the views as needed.

Walkthrough Path from Saved Views.
Orbit and Spin Animations
Orbit or Spin animations offer a different animation style that can be easily created under the Create Animation dropdown menu.
Orbit Animation Path selected with a floating view pane.
Solar Animations
If you’re designing for a live outdoor event, solar animations are a great way to show how natural light will interact with your mobile stages, lights, technical equipment, or other scenic elements.
These animations display the sun’s impact on a model by specifying the date, time, and view.
To create solar animations:
1. Insert at least one Heliodon object via your Visualization toolset.
2. Select a desired view and render mode.
3. Use the Heliodon’s Solar Animation option in the Object Info Palette (OIP) or double-click the object.
4. Configure parameters like date, time, and animation type in the Solar Animation dialog.

Heliodon object selected.
Editing and Customizing Animations in Vectorworks Spotlight
As with almost any other feature in Vectorworks Spotlight, there’s plenty of room to edit and customize animations. Refining animations in Vectorworks Spotlight allows for greater control over movement, timing, and camera perspectives. Using the Reshape tool, you can modify animation paths just like NURBS curves, while reshaping a Walk or Orthogonal Orbit path automatically converts it to a Fly Freely type.
Keyframe adjustments ensure smooth transitions and dynamic movement. Select the animation path in the Visualization palette or OIP to reposition keyframes, adjust timing, or modify the Look-to Point for better camera focus. You can also open a Dedicated Camera view pane to edit perspectives in real time.
Managing multiple camera views is crucial for fluid animations. Walkthrough paths automatically generate keyframes at corners and curve apexes, while orbit and spin paths space them evenly. To fine-tune motion, delete or add keyframes through the OIP or right-click the path. Adjust the Time value to refine positioning and control pacing. Camera focus, View Angle, and Camera Height can also be modified to achieve your desired framing.
Speed adjustments further refine movement, ensuring a natural flow. By default, time is distributed equally across keyframes, but you can assign varying speeds to emphasize key moments in your production. Vectorworks automatically balances speed changes to maintain the total animation duration.
Rendering and Exporting Animations in Vectorworks Spotlight
There are two ways to render and export your animations in Vectorworks Spotlight, which facilitates your ability to present and collaborate.
Creating a Movie File
To turn your animations into a video file, like an MP4, perform the following:
1. Set class and layer visibilities as needed or update Saved Views, if used.
2. Select the animation path or access it from the Visualization palette.
3. Click Create Movie in the OIP.
4. Adjust custom settings such as resolution, frame rate, and duration.
5. Export the movie file for client presentations or online sharing.

Using Vectorworks Cloud Services
For large-scale renderings and more collaborative reviews, it’s best to leverage the power of Vectorworks Cloud Services. With Vectorworks Cloud Services, you can send your drawings, renderings, and animations for automatic processing in the background. At the same time, you can simultaneously still work on your projects on the desktop application without disruption.
To create animated presentations with the Cloud:
1. Select Cloud Services in the Create Movie dialog.
2. Ensure you are logged into your Vectorworks account.
3. Receive an email notification once the render is complete.
As you can see, Vectorworks Spotlight’s animation capabilities offer you a competitive edge. These tools bring projects to life, streamline collaboration, and reduce costly on-site adjustments. By integrating animations into your workflow, you can create polished, professional presentations that resonate with clients and colleagues alike.
FREE TRIAL
Start a free trial of Vectorworks Spotlight today and begin experimenting with animations.
Stay in the know with the latest insights
Subscribers receive news, customer stories, success and learning tips, event information, and other important announcements from Vectorworks.
By submitting this form, you agree that Vectorworks, Inc. and its authorized partners may contact you in regards to news, offers, and the use of our software, services, and platforms. Learn more about our privacy practices and your data on our privacy page.*